11th Daring Bakers Challenge – Pizza & Toppings
29 October, 2008 at 3:59 pm | Posted in » Daring Bakers, » Fresh Breads & Buns, » Recipes | 5 CommentsTags: » Daring Bakers, Baking, Food, Pizza, recipe

This month the Daring Bakers are going to be pizzaiolos!
Hosted by our dear vegan/gluten free baker: Rosa of Rosa’s Yummy Yums. For this challenge, she has chosen an easy to follow recipe for ‘Pizza Napoletana’ from ‘The Bread Baker’s Appretice’ , by Peter Reinhart, which yields a beautifully tasty, thin, crispy, yet chewy pizza crust.
I have always love to make my own pizzas, so this is definitely not something new to me… just that it will be using a different recipe and technique. I never have a home-made toss pizza crust before, this is sure to be challenge and I did not manage to get any photos on the tossing.
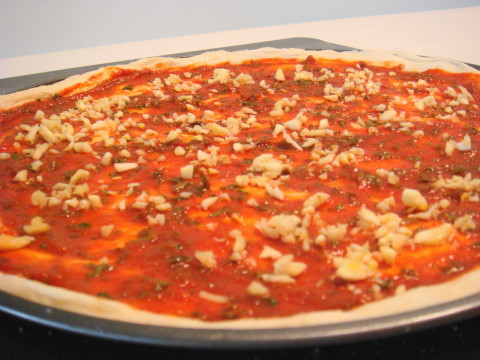
There is basically no restriction or rules to this month challenge, we are free to use any sauce and toppings, make it vegan or non-vegan. I choose to make the non-vegan version, and I have also half the recipe shown here. This crust recipe is definitely a keeping for me.
That being said, have a look at the following photos:


Have a look at what other DBers have created here.
Ingredients:
Make 6 pizza crusts (about 9-12 inches/23-30cm in diameter)
4-1/2 cups (20-1/4 ounces/607.5 grams) unbleached high-gluten (%14) bread flour or all purpose flour, chilled
1-3/4 tsp salt
1 tsp instant yeast
1/4 cup (2 ounces/60 grams) Olive oil or vegetable oil (both optional, but it’s better with)
1-3/4 cups (14 ounces/420 grams or 420 ml) water, ice cold (40° /4.5° C)
1 Tb sugar
Semolina/durum flour or cornmeal for dusting
DAY ONE
Method:
1. Mix together the flour, salt and instant yeast in a big bowl (or in the bowl of your stand mixer).
2. Add the oil, sugar and cold water and mix well (with the help of a large wooden spoon or with the paddle attachment, on low speed) in order to form a sticky ball of dough. On a clean surface, knead for about 5-7 minutes, until the dough is smooth and the ingredients are homogeneously distributed. If it is too wet, add a little flour (not too much, though) and if it is too dry add 1 or 2 teaspoons extra water.
NOTE: If you are using an electric mixer, switch to the dough hook and mix on medium speed for the same amount of time.The dough should clear the sides of the bowl but stick to the bottom of the bowl. If the dough is too wet, sprinkle in a little more flour, so that it clears the sides. If, on the contrary, it clears the bottom of the bowl, dribble in a teaspoon or two of cold water.
The finished dough should be springy, elastic, and sticky, not just tacky, and register 50°-55° F/10°-13° C.
3. Flour a work surface or counter. Line a jelly pan with baking paper/parchment. Lightly oil the paper.
4. With the help of a metal or plastic dough scraper, cut the dough into 6 equal pieces (or larger if you want to make larger pizzas).
NOTE: To avoid the dough from sticking to the scraper, dip the scraper into water between cuts.
5. Sprinkle some flour over the dough. Make sure your hands are dry and then flour them. Gently round each piece into a ball.
NOTE: If the dough sticks to your hands, then dip your hands into the flour again.
6. Transfer the dough balls to the lined jelly pan and mist them generously with spray oil. Slip the pan into plastic bag or enclose in plastic food wrap.
7. Put the pan into the refrigerator and let the dough rest overnight or for up to thee days.
NOTE: You can store the dough balls in a zippered freezer bag if you want to save some of the dough for any future baking. In that case, pour some oil(a few tablespooons only) in a medium bowl and dip each dough ball into the oil, so that it is completely covered in oil. Then put each ball into a separate bag. Store the bags in the freezer for no longer than 3 months. The day before you plan to make pizza, remember to transfer the dough balls from the freezer to the refrigerator.
DAY TWO
8. On the day you plan to eat pizza, exactly 2 hours before you make it, remove the desired number of dough balls from the refrigerator. Dust the counter with flour and spray lightly with oil. Place the dough balls on a floured surface and sprinkle them with flour. Dust your hands with flour and delicately press the dough into disks about 1/2 inch/1.3 cm thick and 5 inches/12.7 cm in diameter. Sprinkle with flour and mist with oil. Loosely cover the dough rounds with plastic wrap and then allow to rest for 2 hours.
9. At least 45 minutes before making the pizza, place a baking stone on the lower third of the oven. Preheat the oven as hot as possible (500° F/260° C).
NOTE: If you do not have a baking stone, then use the back of a jelly pan. Do not preheat the pan.
10. Generously sprinkle the back of a jelly pan with semolina/durum flour or cornmeal. Flour your hands (palms, backs and knuckles). Take 1 piece of dough by lifting it with a pastry scraper. Lay the dough across your fists in a very delicate way and carefully stretch it by bouncing it in a circular motion on your hands, and by giving it a little stretch with each bounce. Once the dough has expanded outward, move to a full toss.
NOTE: Make only one pizza at a time.
During the tossing process, if the dough tends to stick to your hands, lay it down on the floured counter and reflour your hands, then continue the tossing and shaping.
In case you would be having trouble tossing the dough or if the dough never wants to expand and always springs back, let it rest for approximately 5-20 minutes in order for the gluten to relax fully,then try again.
You can also resort to using a rolling pin, although it isn’t as effective as the toss method.
11. When the dough has the shape you want (about 9-12 inches/23-30 cm in diameter – for a 6 ounces/180g piece of dough), place it on the back of the jelly pan, making sure there is enough semolina/durum flour or cornmeal to allow it to slide and not stick to the pan.
12. Lightly top it with sweet or savory toppings of your choice.
NOTE: Remember that the best pizzas are topped not too generously. No more than 3 or 4 toppings (including sauce and cheese) are sufficient.
13. Slide the garnished pizza onto the stone in the oven or bake directly on the jelly pan. Close the door and bake for abour 5-8 minutes.
14. Take the pizza out of the oven and transfer it to a cutting board or your plate. In order to allow the cheese to set a little, wait 3-5 minutes before slicing or serving.
Mid-Autumn Festival
11 September, 2008 at 11:06 pm | Posted in » Recipes, » Yummy Cakes | 1 CommentTags: Baking, Cake, Food, recipe
The Mid-Autumn festival, also known as the Mooncake or Moon festival, falls on September 14th this year.
Every year on the fifteenth day of the eighth month of the lunar calendar, when the moon is at its maximum brightness for the entire year, the Chinese celebrate ‘zhong qiu jie’. Children are told the story of the moon fairy living in a crystal palace, who comes out to dance on the moon’s shadowed surface. The legend surrounding the ‘lady living in the moon’ dates back to ancient times, to a day when ten suns appeared at once in the sky. The Emperor ordered a famous archer to shoot down the nine extra suns. Once the task was accomplished, Goddess of Western Heaven rewarded the archer with a pill that would make him immortal. However, his wife found the pill, took it, and was banished to the moon as a result. Legend says that her beauty is greatest on the day of the Moon festival.
Other Moon Festival Legends
According to another legend, on this day the ‘Man in the Moon’ was spotted at an inn, carrying a writing tablet. When questioned, he said he was recording the names of all the happy couples who were fated to marry and live happily forever after. Accordingly, just as June is the traditional month for exchanging nuptials in the west, many Chinese weddings are held during the eighth lunar month, with the fifteenth day being the most popular.
Of course, the most famous legend surrounding the Moon festival concerns its possible role in Chinese history. Overrun by the Mongols in the thirteenth century, the Chinese threw off their oppressors in 1368 AD. It is said that mooncakes – which the Mongols did not eat – were the perfect vehicle for hiding and passing along plans for the rebellion. Families were instructed not to eat the mooncakes until the day of the moon festival, which is when the rebellion took place.
How to Celebrate the Mid-Autumn Festival
Today, Chinese people celebrate the Mid-Autumn festival with dances, feasting and moon gazing. Not to mention mooncakes. While baked goods are a common feature at most Chinese celebrations, mooncakes are inextricably linked with the Moon festival. One type of traditional mooncake is filled with lotus seed paste. Roughly the size of a human palm, these mooncakes are quite filling, meant to be cut diagonally in quarters and passed around. The salty yolk in the middle, representing the full moon, is an acquired taste.
More elaborate versions of mooncakes contain four egg yolks, which representing the four phases of the moon. Besides lotus seed paste, other traditional fillings include red bean paste and black bean paste.
While in the past mooncakes took up to four weeks to make, automation has speed up the process considerably. Today, mooncakes may be filled with everything from dates, nuts, and fruit to Chinese sausages. More exotic creations include green tea mooncakes, and ping pei or snowskin mooncakes, a Southeast Asian variation made with cooked glutinous rice flour. There is even a line of ice cream mooncakes.
This year is my 1st attempt to make both the traditional and snow skin mooncake.


Traditional Mooncake
Ingredients:
Make about 23 mini Mooncakes
Mooncake Pastry
350 grams – 400 grams Hong Kong Flour
230 grams sugar syrup
110 ml oil
1 Tablespoon alkaline water
Mooncake Filling
500 – 600 grams ready made white lotus paste (or any other flavour paste)
some melon seeds
some salted egg yolks, cooked and halved
Galze
1 egg, beaten
Method:
1. In a mixing bowl, mix together the sugar syrup, oil and alkaline water. Leave aside for at least 1 hour.
2. Add in the flour and mix well until the mixture is not sticky. Add in more flour if the mixture is running.
3. Mix together the ready made paste and melon. Divide into 45 grams each.
4. Wrap a egg yolk in the center of each paste and roll into a ball.
5. Divide the pastry skin into 30 grams each. Wrap the paste ball into the pastry skin. Press into mould.
6. Line a baking tray with baking paper and bake with top grill for about 5 mins.
7. Adjust the oven to top and bottom heat at 375 deg F. Brush the mooncake surface with egg wash. Bake for another 15-20 mins until golden brown.
8. Cool at room temperature.
Note: Traditional Mooncakes are best eaten 1-2 days after making. Mooncakes can be stored in air-tight containers up to 3 days after making, after that put in the fridge.
Snow Skin Mooncake
Ingredients:
Make about 18 Mini Mooncakes
Snow Skin Pastry
1 package (500 grams) snow skin premix
100 grams shortening
230 grams water
a few drops of flavored food color (I divide into 3 portion, 1 for green tea flavour, 1 for yam flavour, 1 for pandan flavour)
Mooncake Filling
500 grams ready made white lotus paste (or any other flavour paste)
some melon seeds
some salted egg yolks, cooked and halved
Method:
1. Mix the water and the premix together.
2. Add in shortening and food color.
3. Leave aside for about 15 mins – 1 hour.
4. Mix together the ready made paste and the melon seeds. Divide into 45 grams each.
5. Wrap a egg yolk in the center of each paste and roll into a ball.
6. Divide the snow skin pastry into 35 grams each. Wrap the paste ball into the snow skin. Press into mould.
7. Refrigerate for at least 1 hour before serving.
9th Daring Bakers Challenge – Chocolate Élairs
31 August, 2008 at 12:36 am | Posted in » Daring Bakers, » Recipes, » Pastry | 4 CommentsTags: » Daring Bakers, Baking, Food, Pastry, recipe
Hi All! It’s that time of the month again and this month we are going French!
Hosted by Tony of Tony Tahhan and Meeta of What’s for Lunch Honey?, they have chosen a recipe from Chocolate Desserts By Pierre Hermé, a cookbook written by Dorie Greenspan, Chocolate Éclairs by Pierre Hermé.
Some information on Éclair taken from Wikipedia. The Éclair is originated in France during the nineteenth century. The work is first attested both in English and in French in the 1860s. Some food historians speculate that the Éclairs were first made by Anotonin Carême (1784 – 1833), the famous French chef. The first known English-language recipe for Éclairs appears in the Boston Cooking School Cook Book by Mrs. D.A. Lincoln, published in 1884.
A Éclair is a long, thin pastry made with choux pastry or cream puff dough filled with a cream and topped with icing. The dough is piped into an oblong shape with a pastry bag and baked until it is crisp and hollow inside. Once cool, the pastry then is filled with a pastry cream, custard or whipped cream and topped with fondant icing of the same flavour as the filling.
For this month challenge, we are given alot of space to play around as long as we use the choux pastry recipe provided and keep one of the chocolate element, i.e the chocolate glaze and/or the chocolate pastry cream.
Being a chocoholic, I kept two of the chocolate elements but i omit the chocolate sauce that is supposed to be added into the chocolate glaze. And on top of that, I have added some chopped peanuts on top of the glaze. I simply love the taste of this recipe! It’s so chocolaty and yummy…
This recipe is relative simple, but I had some trouble making the chocolate glaze. When I added the butter in the glaze, there are alot of oil being produced and I have to pour away some and stir over low heat to combine them… thus I could not make a smooth glaze…


Remember to drop by other DBers’s blogs for their take on this here.
Cream Puff Dough
Ingredients:
Makes 20 – 24 Éclairs
1/2 cup (125 grams) whole milk
1/2 cup (125 grams) water
1 stick (4 ounces; 115 grams) unsalted butter, cut into 8 pieces
1/4 teaspoon sugar
1/4 teaspoon salt
1 cup (140 grams) all-purpose flour
5 large eggs, at room temperature
Method:
1. In a heavy bottomed medium saucepan, bring the milk, water, butter, sugar and salt to the boil.
2. Once the mixture is at a rolling boil, add all of the flour at once, reduce the heat to medium and start to stir the mixture vigorously with a wooden spoon. The dough comes together very quickly. Do not worry if a slight crust forms at the bottom of the pan, it’s supposed to. You need to carry on stirring for a further 2-3 minutes to dry the dough. After this time the dough will be very soft and smooth.
3. Transfer the dough into a bowl of a mixer fitted with the paddle attachment, or using your handmixer or if you still have the energy, continue by hand. Add the eggs one at a time, beating after each egg has been added to incorporate it into the dough. You will notice that after you have added the first egg, the dough will separate, once again do not worry. As you keep working the dough, it will come back all together again by the time you have added the third egg. In the end the dough should be thick and shiny and when lifted it should fall back into the bowl in a ribbon.
4. The dough should be still warm. It is now ready to be used for the éclairs as directed above.
Notes:
1. Once the dough is made you need to shape it immediately.
2. You can pipe the dough and the freeze it. Simply pipe the dough onto parchment-lined baking sheets and slide the sheets into the freezer. Once the dough is completely frozen, transfer the piped shapes into freezer bags. They can be kept in the freezer for up to a month.
Baking Éclairs
1. Preheat your oven to 375 degrees F (190 degrees C). Divide the oven into thirds by positioning the racks in the upper and lower half of the oven. Line two baking sheets with waxed or parchment paper.
2. Fill a large pastry bag fitted with a 2/3 (2cm) plain tip nozzle with the warm cream puff dough. Pipe the dough onto the baking sheets in long, 4 to 4-1/2 inches (about 11 cm) chubby fingers. Leave about 2 inches (5 cm) space in between each dough strip to allow them room to puff. The dough should give you enough to pipe 20-24 éclairs.
3. Slide both the baking sheets into the oven and bake for 7 minutes. After the 7 minutes, slip the handle of a wooden spoon into the door to keep in ajar. When the éclairs have been in the oven for a total of 12 minutes, rotate the sheets top to bottom and front to back. Continue baking for a further 8 minutes or until the éclairs are puffed, golden and firm. The total baking time should be approximately 20 minutes.
Notes:
1. The éclairs can be kept in a cool, dry place for several hours before filling.
Assembling the éclairs:
1. Slice the éclairs horizontally, using a serrated knife and a gently sawing motion. Set aside the bottoms and place the tops on a rack over a piece of parchment paper.
2. The glaze should be barely warm to the touch (between 95 – 104 degrees F or 35 – 40 degrees C, as measured on an instant read thermometer). Spread the glaze over the tops of the éclairs using a metal icing spatula. Allow the tops to set and in the meantime fill the bottoms with the pastry cream.
3. Pipe or spoon the pastry cream into the bottoms of the éclairs. Make sure you fill the bottoms with enough cream to mound above the pastry. Place the glazed tops onto the pastry cream and wriggle gently to settle them.
Notes:
1. If you have chilled your chocolate glaze, reheat by placing it in a bowl over simmering water, stirring it gently with a wooden spoon. Do not stir too vigorously as you do not want to create bubbles.
2. The éclairs should be served as soon as they have been filled.
Chocolate Pastry Cream
Ingredients:
2 cups (500 grams) whole milk
4 large egg yolks
6 tbsp (75 grams) sugar
3 tablespoons cornstarch, sifted
7 oz (200 grams) bittersweet chocolate, preferably Velrhona Guanaja, melted
2-1/2 tbsp (1-1/4 oz, 40 grams) unsalted butter, at room temperature
Method:
1. In a small saucepan, bring the milk to a boil. In the meantime, combine the yolks, sugar and cornstarch together and whisk in a heavy‐bottomed saucepan.
2. Once the milk has reached a boil, temper the yolks by whisking a couple spoonfuls of the hot milk into the yolk mixture.Continue whisking and slowly pour the rest of the milk into the tempered yolk mixture.
3. Strain the mixture back into the saucepan to remove any egg that may have scrambled. Place the pan over medium heat and whisk vigorously (without stop) until the mixture returns to a boil. Keep whisking vigorously for 1 to 2 more minutes (still over medium heat).Stir in the melted chocolate and then remove the pan from the heat.
4. Scrape the pastry cream into a small bowl and set it in an ice‐water bath to stop the cooking process. Make sure to continue stirring the mixture at this point so that it remains smooth.
5. Once the cream has reached a temperature of 140 F remove from the ice‐water bath and stir in the butter in three or four installments. Return the cream to the ice‐water bath to continue cooling, stirring occasionally, until it has completely cooled. The cream is now ready to use or store in the fridge.
Notes:
1. The pastry cream can be made 2‐3 days in advance and stored in the refrigerator.
2. In order to avoid a skin forming on the pastry cream, cover with plastic wrap pressed onto the cream.
3. Tempering the eggs raises the temperature of the eggs slowly so that they do not scramble.
Chocolate Glaze
Ingredients:
Makes 1 cup or 300 grams
1/3 cup (80 grams) heavy cream
3-1/2 oz (100 grams) bittersweet chocolate, finely chopped
4 tsp (20 grams) unsalted butter, cut into 4 pieces, at room temperature
7 tbsp (110 grams) Chocolate Sauce (recipe below), warm or at room temperature
Method:
1. In a small saucepan, bring the heavy cream to a boil. Remove from the heat and slowly begin to add the chocolate, stirring with a wooden spoon or spatula.
2. Stirring gently, stir in the butter, piece by piece followed by the chocolate sauce.
Notes:
1. If the chocolate glaze is too cool (i.e. not liquid enough) you may heat it briefly in the microwave or over a double boiler. A double boiler is basically a bowl sitting over (not touching) simmering water.
2. It is best to glaze the eclairs after the glaze is made, but if you are pressed for time, you can make the glaze a couple days ahead of time, store it in the fridge and bring it up to the proper temperature (95 to 104 F) when ready to glaze.
Chocolate Sauce
Ingredients:
Makes 1-1/2 cups or 525 grams
4-1/2 oz (130 grams) bittersweet chocolate, finely chopped
1 cup (250 grams) water
1/2 cup (125 grams) crème fraîche, or heavy cream
1/3 cup (70 grams) sugar
Method:
1. Place all the ingredients into a heavy‐bottomed saucepan and bring to a boil, making sure to stir constantly. Then reduce the heat to low and continue stirring with a wooden spoon until the sauce thickens.
2. It may take 10‐15 minutes for the sauce to thicken, but you will know when it is done when it coats the back of your spoon.
Notes:
1. You can make this sauce ahead of time and store it in the refrigerator for two weeks. Reheat the sauce in a microwave oven or a double boiler before using.
2. This sauce is also great for cakes, ice-cream and tarts.
6th Daring Baker’s Challenge – Opéra Cake
28 May, 2008 at 6:53 pm | Posted in » Daring Bakers, » Recipes, » Yummy Cakes | 6 CommentsTags: Add new tag, » Daring Bakers, Baking, Cake, Food, recipe
This month DB Challenge is an extremely elegant and polished French dessert that is believed to have been created around the beginning of the 1900s. Many people credit a gentleman by the name of Louis Clichy with inventing the cake and that’s why it’s sometimes referred to as Clichy Cake.
This cake is made up of five components namely: a joconde (cake layer), syrup, buttercream, ganache or mousse and a final glaze.
Traditionally, this cake is flavoured with darker flavours such as chocolate or coffee. But our hostesses of this month, Lis of La Mia Cucina, Ivonne of Cream Puffs in Venice, Fran of Apples Peaches Pumpkin Pie and Shea of Whiskful, decided to have this cake light in both color and flavour.
We are allow to add any flavours to the cake as long as it stays light in color and flavour. I have added Rum to the syrup and some lemon extract to the buttercream… And I really love the combination of these flavours!
Here are the pix… cant really see the buttercream layer, it was quite a challenge to spread it…


You can view the rest of the Daring Bakers’ Opéra Cakes here.
For the joconde
(Note: The joconde can be made up to 1 day in advance and kept wrapped at room temperate)
What you’ll need:
– 2 12-1/2 x 15-1/2-inch (31 x 39-cm) jelly-roll pans (Note: If you do not have jelly-roll pans this size, do not fear! You can use different-sized jelly-roll pans like 10 x 15-inches.)
– a few tablespoons of melted butter (in addition to what’s called for in the ingredients’ list) and a brush (to grease the pans)
– parchment paper
– a whisk and a paddle attachment for a stand mixer or for a handheld mixer
– two mixing bowls (you can make do with one but it’s preferable to have two)
Ingredients:
6 large egg whites, at room temperature
2 tbsp. (30 grams) granulated sugar
2 cups (225 grams) ground blanched almonds
2 cups icing sugar, sifted
6 large eggs
1/2 cup (70 grams) all-purpose flour
3 tbsp. (1-1/2 ounces; 45 grams) unsalted butter, melted and cooled
Method:
1. Divide the oven into thirds by positioning a rack in the upper third of the oven and the lower third of the oven.
2. Preheat the oven to 425◦F. (220◦C).
3. Line two 12-1/2 x 15-1/2- inch (31 x 39-cm) jelly-roll pans with parchment paper and brush with melted butter.
4. In the bowl of a stand mixer fitted with the whisk attachment (or using a handheld mixer), beat the egg whites until they form soft peaks. Add the granulated sugar and beat until the peaks are stiff and glossy. If you do not have another mixer bowl, gently scrape the meringue into another bowl and set aside.
5. If you only have one bowl, wash it after removing the egg whites or if you have a second bowl, use that one. Attach the paddle attachment to the stand mixer (or using a handheld mixer again) and beat the almonds, icing sugar and eggs on medium speed until light and voluminous, about 3 minutes.
6. Add the flour and beat on low speed until the flour is just combined (be very careful not to overmix here!!!).
7. Using a rubber spatula, gently fold the meringue into the almond mixture and then fold in the melted butter. Divide the batter between the pans and spread it evenly to cover the entire surface of each pan.
8. Bake the cake layers until they are lightly browned and just springy to the touch. This could take anywhere from 5 to 9 minutes depending on your oven. Place one jelly-roll pan in the middle of the oven and the second jelly-roll pan in the bottom third of the oven.
9. Put the pans on a heatproof counter and run a sharp knife along the edges of the cake to loosen it from the pan. Cover each with a sheet of parchment or wax paper, turn the pans over, and unmold.
10. Carefully peel away the parchment, then turn the parchment over and use it to cover the cakes. Let the cakes cool to room temperature.
For the syrup
(Note: The syrup can be made up to 1 week in advance and kept covered in the refrigerator.)
Ingredients:
1/2 cup (125 grams) water
1/3 cup (65 grams) granulated sugar
1 to 2 tbsp. of the flavouring of your choice (i.e., vanilla extract, almond extract, cognac, limoncello, coconut cream, honey etc.)
Method:
1. Stir all the syrup ingredients together in the saucepan and bring to a boil.
2. Remove from the heat and let cool to room temperature.
For the buttercream
(Note: The buttercream can be made up to 1 month in advance and packed in an airtight container. If made way in advance, you can freeze the buttercream. Alternatively you can refrigerate it for up to 4 days after making it. To use the buttercream simply bring it to room temperature and then beat it briefly to restore its consistency.)
Ingredients:
1 cup (100 grams) granulated sugar
1/4 cup (60 grams) water
seeds of one vanilla bean (split a vanilla bean down the middle and scrape out the seeds) or 1 tbsp. pure vanilla extract (Note: If you are flavouring your buttercream and do not want to use the vanilla, you do not have to. Vanilla will often enhance other flavours but if you want an intense, one-flavoured buttercream, then by all means leave it out!)
1 large egg
1 large egg yolk
1-3/4 cups (7 ounces; 200 grams) unsalted butter, at room temperature
flavouring of your choice (a tablespoon of an extract, a few tablespoons of melted white chocolate, citrus zest, etc.)
Method:
1. Combine the sugar, water and vanilla bean seeds or extract in a small saucepan and warm over medium heat just until the sugar dissolves.
2. Continue to cook, without stirring, until the syrup reaches 225◦F (124◦C) on a candy or instant-read thermometer. Once it reaches that temperature, remove the syrup from the heat.
3. While the syrup is heating, begin whisking the egg and egg yolk at high speed in the bowl of your mixer using the whisk attachment. Whisk them until they are pale and foamy.
4. When the sugar syrup reaches the correct temperature and you remove it from the heat, reduce the mixer speed to low speed and begin slowly (very slowly) pouring the syrup down the side of the bowl being very careful not to splatter the syrup into the path of the whisk attachment. Some of the syrup will spin onto the sides of the bowl but don’t worry about this and don’t try to stir it into the mixture as it will harden!
5. Raise the speed to medium-high and continue beating until the eggs are thick and satiny and the mixture is cool to the touch (about 5 minutes or so).
6. While the egg mixture is beating, place the softened butter in a bowl and mash it with a spatula until you have a soft creamy mass.
7. With the mixer on medium speed, begin adding in two-tablespoon chunks. When all the butter has been incorporated, raise the mixer speed to high and beat until the buttercream is thick and shiny.
8. At this point add in your flavouring and beat for an additional minute or so.
9. Refrigerate the buttercream, stirring it often, until it’s set enough (firm enough) to spread when topped with a layer of cake (about 20 minutes).
For the white chocolate ganache/mousse
(Note: The mousse can be made ahead and refrigerated until you’re ready to use it.)
Ingredients:
7 ounces white chocolate
1 cup plus 3 tbsp. heavy cream (35% cream)
1 tbsp. liquer of your choice (Bailey’s, Amaretto, etc.)
Method:
1. Melt the white chocolate and the 3 tbsp. of heavy cream in a small saucepan.
2. Stir to ensure that it’s smooth and that the chocolate is melted. Add the tablespoon of liqueur to the chocolate and stir. Set aside to cool completely.
3. In the bowl of a stand mixer, whip the remaining 1 cup of heavy cream until soft peaks form.
4. Gently fold the whipped cream into the cooled chocolate to form a mousse.
5. If it’s too thin, refrigerate it for a bit until it’s spreadable.
6. If you’re not going to use it right away, refrigerate until you’re ready to use.
For the glaze
(Note: It’s best to make the glaze right when you’re ready to finish the cake.)
Ingredients:
14 ounces white chocolate, coarsely chopped
1/2 cup heavy cream (35% cream)
Method:
1. Melt the white chocolate with the heavy cream. Whisk the mixture gently until smooth.
2. Let cool for 10 minutes and then pour over the chilled cake. Using a long metal cake spatula, smooth out into an even layer.
3. Place the cake into the refrigerator for 30 minutes to set.
Assembling the Opéra Cake
(Note: The finished cake should be served slightly chilled. It can be kept in the refrigerator for up to 1 day).
1. Line a baking sheet with parchment or wax paper.
2. Working with one sheet of cake at a time, cut and trim each sheet so that you have two pieces (from each cake so you’ll have four pieces in total): one 10-inch (25-cm) square and one 10 x 5-inch (25 x 12-1/2-cm) rectangle.
3. Step A (if using buttercream only and not making the ganache/mousse):
4. Place one square of cake on the baking sheet and moisten it gently with the flavoured syrup.
5. Spread about one-third of the buttercream over this layer.
6. Top with the two rectangular pieces of cake, placing them side by side to form a square. Moisten these pieces with the flavoured syrup.
7. Spread another third of the buttercream on the cake and then top with the third square of joconde. Use the remaining syrup to wet the joconde. Spread the remaining buttercream on top of the final layer of joconde and then refrigerate until very firm (at least half an hour).
8. Make the glaze and after it has cooled, pour/spread it over the top of the chilled cake. Refrigerate the cake again to set the glaze.
9. Serve the cake slightly chilled. This recipe will yield approximately 20 servings.
10. Step B (if making the ganache/mousse):
11. Place one square of cake on the baking sheet and moisten it gently with the flavoured syrup.
12. Spread about three-quarters of the buttercream over this layer.
13. Top with the two rectangular pieces of cake, placing them side by side to form a square. Moisten these pieces with the flavoured syrup.
14. Spread the remaining buttercream on the cake and then top with the third square of joconde. Use the remaining syrup to wet the joconde and then refrigerate until very firm (at least half an hour).
15. Prepare the ganache/mousse (if you haven’t already) and then spread it on the top of the last layer of the joconde. Refrigerate for at least two to three hours to give the ganache/mousse the opportunity to firm up.
16. Make the glaze and after it has cooled, pour/spread it over the top of the chilled cake. Refrigerate the cake again to set the glaze.
17. Serve the cake slightly chilled. This recipe will yield approximately 20 servings.
Banana Bread
7 April, 2008 at 11:22 am | Posted in » Recipes, » Yummy Cakes | 5 CommentsTags: Baking, Cake, Food, recipe

Made a Banana bread yesterday… finally. It has been ages since I made one… I have added some mixed spice and chopped almonds to the recipe and I like the combination of the flavours. The mixed spice goes very well with the banana.
The interior of the bread…

Ingredients:
100 grams chopped almonds (optional)
245 grams all-purpose flour
150 grams granulated white sugar
1 teaspoons baking powder
1/4 teaspoon baking soda
1/4 teaspoon salt
1/2 teaspoon mixed spice
2 large eggs, lightly beaten
113 grams unsalted butter, melted and cooled
450 grams ripe large bananas, mashed well
1 teaspoon pure vanilla
Method:
1. Preheat oven to 180 degrees C and place oven rack to middle position. Butter and flour the bottom and sides of a 9 x 5 x 3 inch (23 x 13 x 8 cm) loaf pan. Set aside.
2. Place the nuts on a baking sheet and bake for about 8 to 10 minutes or until lightly toasted. Let cool and then chop coarsely.
3. In a large bowl combine the flour, sugar, baking powder, baking soda, salt, cinnamon, and nuts. Set aside.
4. In a medium-sized bowl combine the mashed bananas, eggs, melted butter, and vanilla. With a rubber spatula or wooden spoon, lightly fold the wet ingredients (banana mixture) into the dry ingredients just until combined and the batter is thick and chunky. (The important thing is not to over mix the batter. You do not want it smooth. Over mixing the batter will yield tough, rubbery bread.)
5. Scrape batter into prepared pan and place the slices of banana on top of the batter for garnish.
6. Bake until bread is golden brown and a toothpick inserted in the center comes out clean, about 55 to 60 minutes.
7. Place on a wire rack to cool and then remove the bread from the pan. Serve warm or at room temperature.
4th Daring Bakers Challenge – Dorie’s Perfect Party Cake
31 March, 2008 at 10:26 am | Posted in » Daring Bakers, » Recipes, » Yummy Cakes | 16 CommentsTags: Baking, cakes, Food, recipe
This month’s DB Challenge is taken from the baking book, Baking: From My Home to Yours by Dorie Greenspan. Hosted by lovely Morven of Food Art and Random Thoughts.
This is how the writer describe this cake: “The cake is snow white, with an elegant tight crumb and an easygoing nature: it always bakes up perfectly; it is delicate on the tongue but sturdy in the kitchen – no fussing when it comes to slicing the layers in half or cutting tall, beautiful wedges for serving; and, it tastes just as you’d want a party cake to taste – special.”
Doesn’t it sounds like just the kind of cake you wana have for any birthdays ? Well, at least it does to me.. =) But mine turns out to be otherwise… =(

The messy layers…

The cake didn’t rise much and have quite a dense texture… dunno if it suppose to be like that? I did not do a good job on the layering of the jam & buttercream and the final frosting. I have have substitute the shredded coconut with chopped almonds. This cake have alot of buttercream… I dun think I will be using this recipe again as I am never a fan of buttercream… it’s just too fattening and too buttery for me…
Sorry I’m a day late for this post, got back home very late yesterday from Malaysia. Check out how others did here.
Here’s what I did using the left over egg yolks…. Leche Flan!! And I think I over boil the sugar… thus the dark color of the caramel… =(

Ingredients:
(A)
1 cup sugar
1/3 cup water
(B)
7-8 egg yolks
1 can less 1/4 cup condensed milk (I used low fat)
1 cup evaporated milk
1/4 tsp lemon extract
Method:
1. Put sugar and water (A) in a pan. Let boil under moderate heat. Let sugar melt and water evaporate. When syrup is thick and amber colored pour into llaneras (oval flan molds) or ramekins will also do. Let cool.
2. Combine egg yolks, condensed milk and evaporated milk. Blend well. Add lemon extract. Mix until well combined.
3. Pour mixture into llaneras or baking tins (1 inch thick). (Make sure sugar syrup is completely cooled before pouring the mixture). Cover llaneras with foil so water doesn’t get into the custard mixture while steaming.
4. You can cook these either baine-marie style or you can simply steam it. I prefer to use the latter method since it’s a lot simpler. Use high heat initially until water boils then lower the heat to low. Cook for about 45 minutes to one hour depending how thick you made your custard.
5. When done, chill.
6. To serve – unmold leche flan by running a thin knife around the llanera. Put a serving plate on top of the llanera, up-side-down. Invert and remove llanera.
Mochi Bread: finding the right recipe…
29 March, 2008 at 10:53 am | Posted in » Fresh Breads & Buns, » Recipes | 26 CommentsTags: Baking, Bread, Food, recipe
Saw an interesting thread in a baking forum which I frequent… it is Mochi Bread made by Sun Moulin Bakery @ Isetan Scotts. I have never try this before, but would like to see how mine turns out, so I went ahead with the experiment journey together with the rest of the fellow forumers… if you are interested as well you can get more information here.
I have change the recipe slightly to see whether it gets the right texture since the rest of the recipe is yet to have.
And here’s my result – the crust is crispy even after awhile and the interior is chewy

Ingredients:
100 grams glutinous flour (mochiko flour)
20 grams cake flour
1/4 tsp baking soda
1 tbsp soy flour (can substitute with cheese powder)
1 tbsp milk
100 grams water
40 grams sugar
1/2 tsp salt
20 grams butter
10 grams shortening
1/2 egg (beaten)
Method:
1. Preheat oven to 170 deg C.
2. Sieve glutinous flour, soy flour (or cheese powder), cake flour and baking soda together.
3. In a saucepan, bring water to boil, add water and salt. Add in butter and shortening. Remove from heat. Slowly sprinkle the flour mixture until well combined and form a dough.
4. Slowly pour the wet butter mixture into the flour mixture, stir until well combined and forms a dough.
5. Stir in the milk and stir in beaten egg, a spoonful at a time.
6. Use a piping bag with plain nozzle, pipe out the batter.
7. Bake at 170 deg C for 15 – 20 mins, reduced to 150 deg C and bake for another 10 mins with oven door slightly ajar.
8. You can also sprinkling some sugar or cheese powder on top.
Green Tea Chiffon Cake
12 March, 2008 at 10:14 pm | Posted in » Recipes, » Yummy Cakes | 1 CommentTags: Baking, cakes, Food, recipe

I made this cake yesterday. Instead of the usual pandan flavour, I have used green tea powder. The texture of this cake is very moist, soft, spongy and the sweetness is just right. Hubby and I love it. We wanted to bring some for my MIL but, we didn’t even have enuff for ourselves!
The inside of the cake…

Ingredients:
(A)
4 egg yolks
30 grams castor sugar
1 tablespoon honey
pinch of salt
(B)
4 tablespoons of warm corn oil
80 ml warm water + 2-3 teaspoons green tea powder
2 – 3 teaspoons rum
(C)
100 grams cake flour
3/4 teaspoon baking powder
(D)
4 egg whites
1/2 teaspoon cream of tartart
30 grams castor sugar
Method:
1. Cream ingredients (A) with hand whisk till sugar dissolved.
2. Add in ingredients (B) in the respective order and mix well before adding the next item.
3. Sieve in ingredients (C) and mix till no lumps.
4. Beat egg whites with electric beater till frothy, sprinkle in the cream of tartar. Beat till white in colour and add in sugar by thirds. Egg white should be beaten till stiff peaks are formed.
5. Put half portion of egg white into yolk mixture and mix it with a hand whisk in 6 strokes.
6. Pour yolk mixture into the rest of the egg white and mix well with hand whisk.
7. Put batter into a chiffon cake pan, bang the pan on a hard surface several times to release the bubbles and bake at 170C – 180C for 35 -45 minutes or till cooked.
8. When the cake is cooked, remove from oven and give it another bang on a hard surface to loosen the cake texture then invert cooked cake on a wire rack to cool for 15 – 20 minutes. Remove cake from cake pan and leave aside to cool completely.
Pineapple Tarts
3 February, 2008 at 12:53 am | Posted in » Bite-size Tarts, » Recipes | 13 CommentsTags: Baking, Food, recipe, tarts

How often do you see pineapples tart on the shelves other then during the CNY period? I would say the chances are low… Pineapple tarts are usually available during CNY period… it’s strange that why this lovely treats are only available during that time of the year… and maybe becos of this, it’s so special and a must have during CNY.
This year I did not make my own pineapple paste, instead, I bought those ready made from my regular baking supply shop… hubby was complaining that the paste is not nice, not moist enough and lack of flavors… I guess he is too used to the pineapple paste I made… heehee
Personally, I dun really like those ready made pineapple paste as well… I always find that it’s too hard for my liking that’s why I always insists on making my own… but this year I’m kinda lazy to make the paste… so I just make do with those ready made…
I modified my usual recipe abit to add some milk… and the outcome turns out quite well, the crust is flaky and kinda melts-in-the-mouth…
Ingredients:
550 grams plain flour
350 grams butter
2 tablespoon icing sugar (if you like your pastry to be sweeter, you can add more)
1 teaspoon bakin powder
1 teaspoon vanilla essence
3 egg yolks
1 egg white
3-4 tablespoon of ice water / cold milk
pinch of salt1 egg, beaten to glaze
1 kg pineapple paste
Method:
1. Sift flour and baking powder together with salt. Add icing sugar. Rub in the butter until mixture resembles breadcrumbs.
2. Lightly work in the vanilla essence, egg yolks and egg white. Add in ice water a teaspoon at a time until dough is soft but not sticky.
3. Preheat oven to 180 degrees C (350 F).
4. Press the dough into a disc, use a pineapple tart cutter to stamp out the tart and arrage on ungreased baking sheet.
4. Glaze with egg. Place a smaller ball of pineapple paste on the centre of the tart and press lightly.
5. Bake for 20 to 25 minutes or until golden brown. Remove from oven and cool for 10 minutes before removing to wire racks to cool completely.
2nd Daring Bakers Challenge
28 January, 2008 at 10:39 am | Posted in » Bite-size Tarts, » Daring Bakers, » Recipes | 17 CommentsTags: Baking, Food, recipe, tarts
It’s that time of the month again… yup! It’s time for the DB Challenge! This month’s challenge is Lemon Meringue Pie hosted by Jen of Canadian Baker. I have never tasted any of these pies/tarts before… not to mention to bake one so I was looking forward to taste these lovely tangy pies.
The pie requires three components: crust, curd filling and a fluffy meringue. We were given the option to make one single big pie or a couple of tartlets… I made my in the tartlet form cos I feel that it will be more convenient and easiler to eat in the tartlet form.

Hubby says it looked like little porcupines…
Overall, I really like the taste of it, although the lemon curd is abit too sour but, with the combination of the sweet meringue top it blends nicely… not too sweet & not too sour. Even my hubby says it’s nice… ![]()
… maybe next time I try using different flavour for the curd… heehee
Check out how the rest of the Daring bakers did here.
Ingredients:
Makes one 10-inch (25cm) pie
For the Crust:
3/4 cup (175 grams) cold butter; cut into 1/2 inch (1.2 cm) pieces
2 cups (250 grams) all-purpose flour
1/4 cup (50 grams) granulated sugar
1/4 tsp (1.2 mL) salt
1/3 cup (80 mL) ice water
For the Filling:
2 cups (475 mL) water
1 cup (200 grams) granulated sugar
1/2 cup (30 grams) cornstarch
5 egg yolks, beaten
1/4 cup (58 grams) butter
3/4 cup (180 mL) fresh lemon juice
1 tbsp (15 mL) lemon zest
1 tsp (5 mL) vanilla extract
For the Meringue:
5 egg whites, room temperature
1/2 tsp (2.5 mL) cream of tartar
1/4 tsp (1.2 mL) salt
1/2 tsp (2.5 mL) vanilla extract
3/4 cup (150 grams) granulated sugar
Method:
For the Crust:
1. Make sure all ingredients are as cold as possible.
2. Using a food processor or pastry cutter and a large bowl, combine the butter, flour, sugar and salt. Process or cut in until the mixture resembles coarse meal and begins to clump together.
3. Sprinkle with water, let rest 30 seconds and then either process very briefly or cut in with about 15 strokes of the pastry cutter, just until the dough begins to stick together and come away from the sides of the bowl.
4. Turn onto a lightly floured work surface and press together to form a disk. Wrap in plastic and chill for at least 20 minutes.
5. Allow the dough to warm slightly to room temperature if it is too hard to roll. On a lightly floured board (or countertop) roll the disk to a thickness of 1/8 inch (0.3 cm). Cut a circle about 2 inches (5 cm) larger than the pie plate and transfer the pastry into the plate by folding it in half or by rolling it onto the rolling pin. Turn the pastry under, leaving an edge that hangs over the plate about 1/2 inch (1.2 cm). Flute decoratively. Chill for 30 minutes.
6. Preheat oven to 180ºC. Line the crust with foil and fill with metal pie weights or dried beans.
7. Bake for 20 to 25 minutes. Carefully remove the foil and continue baking for 10 to 15 minutes, until golden. Cool completely before filling.
For the Filling:
1. Bring the water to a boil in a large, heavy saucepan. Remove from the heat and let rest 5 minutes. Whisk the sugar and cornstarch together. Add the mixture gradually to the hot water, whisking until completely incorporated.
2. Return to the heat and cook over medium heat, whisking constantly until the mixture comes to a boil. The mixture will be very thick. Add about 1 cup (240 mL) of the hot mixture to the beaten egg yolks, whisking until smooth. Whisking vigorously, add the warmed yolks to the pot and continue cooking, stirring constantly, until mixture comes to a boil.
3. Remove from the heat and stir in butter until incorporated.
4. Add the lemon juice, zest and vanilla, stirring until combined.
5. Pour into the prepared crust. Cover with plastic wrap to prevent a skin from forming on the surface, and cool to room temperature.
For the Meringue:
1. Preheat the oven to 190ºC.
2. Using an electric mixer beat the egg whites with the cream of tartar, salt and vanilla extract until soft peaks form.
3. Add the sugar gradually, beating until it forms stiff, glossy peaks.
4. Pile onto the cooled pie, bringing the meringue all the way over to the edge of the crust to seal it completely. Bake for 15 to 20 minutes, or until golden.
5. Cool on a rack. Serve within 6 hours to avoid a soggy crust.
Free-Style Lemon Tartlets
1. Prepare the recipe as above but complete the following steps:
2. To roll out tartlet dough, slice the dough into 6 pieces. On lightly floured surface, roll each circle of dough into a 5 inch disk. Stack the disks, separated by pieces of plastic wrap, on a plate, and refrigerate for 30 minutes.
3. To bake the dough, position rack in oven to the centre of oven and preheat to 180ºC. Place the disks of dough, evenly spaced, on a baking sheet and bake for 20 to 25 minutes, until golden brown. Cool completely.
4. To finish tartlets, first place oven rack in the upper third of the oven and increase heat to 220ºC.
5. Divide the lemon filling equally among the disks, mounding it in the centre and leaving a 1-inch border all the way around.
6. Spoon the meringue decoratively over each tartlet, right to the edges, in dramatic swirling peaks.
7. Return tartlets to oven and bake for about 5 minutes, until the meringue is golden brown.

Recent Comments
Edna on X’mas Cream-Cheese Fruit… camellia136 on Mochi Bread: finding the right… Nina on X’mas Cream-Cheese Fruit… Amelia on Peanut Butter Cookies Ying on Mochi Bread: finding the right… -


-

Create a free website or blog at WordPress.com.
Entries and comments feeds.
