11th Daring Bakers Challenge – Pizza & Toppings
29 October, 2008 at 3:59 pm | Posted in » Daring Bakers, » Fresh Breads & Buns, » Recipes | 5 CommentsTags: » Daring Bakers, Baking, Food, Pizza, recipe

This month the Daring Bakers are going to be pizzaiolos!
Hosted by our dear vegan/gluten free baker: Rosa of Rosa’s Yummy Yums. For this challenge, she has chosen an easy to follow recipe for ‘Pizza Napoletana’ from ‘The Bread Baker’s Appretice’ , by Peter Reinhart, which yields a beautifully tasty, thin, crispy, yet chewy pizza crust.
I have always love to make my own pizzas, so this is definitely not something new to me… just that it will be using a different recipe and technique. I never have a home-made toss pizza crust before, this is sure to be challenge and I did not manage to get any photos on the tossing.
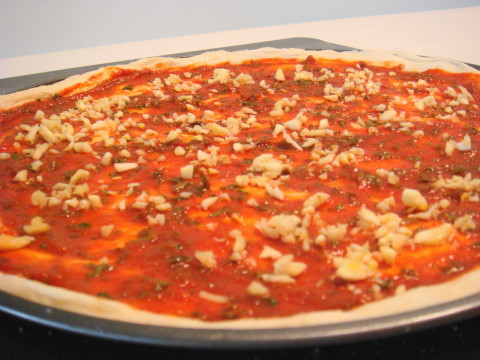
There is basically no restriction or rules to this month challenge, we are free to use any sauce and toppings, make it vegan or non-vegan. I choose to make the non-vegan version, and I have also half the recipe shown here. This crust recipe is definitely a keeping for me.
That being said, have a look at the following photos:


Have a look at what other DBers have created here.
Ingredients:
Make 6 pizza crusts (about 9-12 inches/23-30cm in diameter)
4-1/2 cups (20-1/4 ounces/607.5 grams) unbleached high-gluten (%14) bread flour or all purpose flour, chilled
1-3/4 tsp salt
1 tsp instant yeast
1/4 cup (2 ounces/60 grams) Olive oil or vegetable oil (both optional, but it’s better with)
1-3/4 cups (14 ounces/420 grams or 420 ml) water, ice cold (40° /4.5° C)
1 Tb sugar
Semolina/durum flour or cornmeal for dusting
DAY ONE
Method:
1. Mix together the flour, salt and instant yeast in a big bowl (or in the bowl of your stand mixer).
2. Add the oil, sugar and cold water and mix well (with the help of a large wooden spoon or with the paddle attachment, on low speed) in order to form a sticky ball of dough. On a clean surface, knead for about 5-7 minutes, until the dough is smooth and the ingredients are homogeneously distributed. If it is too wet, add a little flour (not too much, though) and if it is too dry add 1 or 2 teaspoons extra water.
NOTE: If you are using an electric mixer, switch to the dough hook and mix on medium speed for the same amount of time.The dough should clear the sides of the bowl but stick to the bottom of the bowl. If the dough is too wet, sprinkle in a little more flour, so that it clears the sides. If, on the contrary, it clears the bottom of the bowl, dribble in a teaspoon or two of cold water.
The finished dough should be springy, elastic, and sticky, not just tacky, and register 50°-55° F/10°-13° C.
3. Flour a work surface or counter. Line a jelly pan with baking paper/parchment. Lightly oil the paper.
4. With the help of a metal or plastic dough scraper, cut the dough into 6 equal pieces (or larger if you want to make larger pizzas).
NOTE: To avoid the dough from sticking to the scraper, dip the scraper into water between cuts.
5. Sprinkle some flour over the dough. Make sure your hands are dry and then flour them. Gently round each piece into a ball.
NOTE: If the dough sticks to your hands, then dip your hands into the flour again.
6. Transfer the dough balls to the lined jelly pan and mist them generously with spray oil. Slip the pan into plastic bag or enclose in plastic food wrap.
7. Put the pan into the refrigerator and let the dough rest overnight or for up to thee days.
NOTE: You can store the dough balls in a zippered freezer bag if you want to save some of the dough for any future baking. In that case, pour some oil(a few tablespooons only) in a medium bowl and dip each dough ball into the oil, so that it is completely covered in oil. Then put each ball into a separate bag. Store the bags in the freezer for no longer than 3 months. The day before you plan to make pizza, remember to transfer the dough balls from the freezer to the refrigerator.
DAY TWO
8. On the day you plan to eat pizza, exactly 2 hours before you make it, remove the desired number of dough balls from the refrigerator. Dust the counter with flour and spray lightly with oil. Place the dough balls on a floured surface and sprinkle them with flour. Dust your hands with flour and delicately press the dough into disks about 1/2 inch/1.3 cm thick and 5 inches/12.7 cm in diameter. Sprinkle with flour and mist with oil. Loosely cover the dough rounds with plastic wrap and then allow to rest for 2 hours.
9. At least 45 minutes before making the pizza, place a baking stone on the lower third of the oven. Preheat the oven as hot as possible (500° F/260° C).
NOTE: If you do not have a baking stone, then use the back of a jelly pan. Do not preheat the pan.
10. Generously sprinkle the back of a jelly pan with semolina/durum flour or cornmeal. Flour your hands (palms, backs and knuckles). Take 1 piece of dough by lifting it with a pastry scraper. Lay the dough across your fists in a very delicate way and carefully stretch it by bouncing it in a circular motion on your hands, and by giving it a little stretch with each bounce. Once the dough has expanded outward, move to a full toss.
NOTE: Make only one pizza at a time.
During the tossing process, if the dough tends to stick to your hands, lay it down on the floured counter and reflour your hands, then continue the tossing and shaping.
In case you would be having trouble tossing the dough or if the dough never wants to expand and always springs back, let it rest for approximately 5-20 minutes in order for the gluten to relax fully,then try again.
You can also resort to using a rolling pin, although it isn’t as effective as the toss method.
11. When the dough has the shape you want (about 9-12 inches/23-30 cm in diameter – for a 6 ounces/180g piece of dough), place it on the back of the jelly pan, making sure there is enough semolina/durum flour or cornmeal to allow it to slide and not stick to the pan.
12. Lightly top it with sweet or savory toppings of your choice.
NOTE: Remember that the best pizzas are topped not too generously. No more than 3 or 4 toppings (including sauce and cheese) are sufficient.
13. Slide the garnished pizza onto the stone in the oven or bake directly on the jelly pan. Close the door and bake for abour 5-8 minutes.
14. Take the pizza out of the oven and transfer it to a cutting board or your plate. In order to allow the cheese to set a little, wait 3-5 minutes before slicing or serving.
Mochi Bread: finding the right recipe…
29 March, 2008 at 10:53 am | Posted in » Fresh Breads & Buns, » Recipes | 26 CommentsTags: Baking, Bread, Food, recipe
Saw an interesting thread in a baking forum which I frequent… it is Mochi Bread made by Sun Moulin Bakery @ Isetan Scotts. I have never try this before, but would like to see how mine turns out, so I went ahead with the experiment journey together with the rest of the fellow forumers… if you are interested as well you can get more information here.
I have change the recipe slightly to see whether it gets the right texture since the rest of the recipe is yet to have.
And here’s my result – the crust is crispy even after awhile and the interior is chewy

Ingredients:
100 grams glutinous flour (mochiko flour)
20 grams cake flour
1/4 tsp baking soda
1 tbsp soy flour (can substitute with cheese powder)
1 tbsp milk
100 grams water
40 grams sugar
1/2 tsp salt
20 grams butter
10 grams shortening
1/2 egg (beaten)
Method:
1. Preheat oven to 170 deg C.
2. Sieve glutinous flour, soy flour (or cheese powder), cake flour and baking soda together.
3. In a saucepan, bring water to boil, add water and salt. Add in butter and shortening. Remove from heat. Slowly sprinkle the flour mixture until well combined and form a dough.
4. Slowly pour the wet butter mixture into the flour mixture, stir until well combined and forms a dough.
5. Stir in the milk and stir in beaten egg, a spoonful at a time.
6. Use a piping bag with plain nozzle, pipe out the batter.
7. Bake at 170 deg C for 15 – 20 mins, reduced to 150 deg C and bake for another 10 mins with oven door slightly ajar.
8. You can also sprinkling some sugar or cheese powder on top.
3rd Daring Bakers Challenge – Julia Child’s French Bread
29 February, 2008 at 4:11 pm | Posted in » Daring Bakers, » Fresh Breads & Buns | 11 CommentsTags: Baking, Breads, Food
It’s been sometime since I have baked any breads… and I had a strong feeling that this month challenge will be on breads and boy how right could I get ! I was stressed out when I saw this month’s DB Challenge recipe… it was like 11 – 12 pages long!!! Really can faint! I have to read it a few times, dig out all my bread books to research on the technics, and then think of how to do it before I can get myself started on it….
But thanks to our sweet hosts for this month, Breadchick Mary of The Sour Dough and Sara of I Like to Cook, I was able to have a go at this lovely Julia Child’s French Bread, which again I have never done before… Since young, I have been very fond of French Bread and never would I have thought of myself baking it until now…
The recipe is actually very simple, just Yeast, Water (warm & tepid), Salt and of course All-Purpose Flour. So how difficult can this be right? Just add all the ingredients together and mix lah…. if it’s really so simple, the recipe will not be so long and I would not have been so stressed… Yes, the ingredients are very basic… but the steps/technics are not…. I never known that making French Bread could be sooooo tedious!! And the waiting time for the dough to raise and to be totally cool down after baking is really long…. the total time stated from start to end for this recipe is 7 – 9 hours…
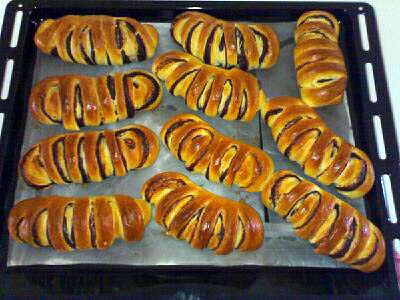
We are given the options to make the bread into several shapes and size shown below:
I have chosen to make mine into tire-bouchons for easy consumption and save the hassle of cutting the bread. It is required to make 1 loaf of plain bread without any toppings, as for the rest of the remaining loaves, I have added roasted white sesame seeds, shredded pasley, chopped garlic and powder cheddar cheese respectively on the top for different type of savoury flavours…
All is well until the first raise… it was suppose to raise up to about triple the original size… but after 3 hours plus, it’s still at it’s doubled size… so I just went ahead with the next step… the second raise & the final proving seems ok…
This is how it looks like after I took it out from the oven, it’s looks quite deciving from the outside…


My bread crust turns out to be crispy…. but it’s too hard… and the inside is quite dense… unlike those I bought from those bread shops… =(
Nevertheless, hubby says the taste is not bad… but the crust too hard… For me, I think the yeast smell is too strong, dunno why…
Even though it did not turn out quite well for me, I would say this month is a very good challenge for me… all thanks to the hosts Breadchick Mary and Sara for coming up with such a wonderful recipe.
I would definitely try to make french bread again… but most likely not with this recipe… it’s too tedious. I will try using my other Bread Books for this.
You can read how the rest of my fellow Daring Bakers did here.
P.S. I’m not going to post the recipe for this month as it’s too long, however you can get the recipe here.
Milk Loaf
21 November, 2007 at 7:20 pm | Posted in » Fresh Breads & Buns, » Recipes | 2 CommentsTags: Baking, Breads
Have been down with dehydration these past few dayz and feeling kinda of restless after all the resting & medicines. Feeling better today, I make an attempt to make a Milk Loaf.

Using the recipe I saw from Happy Home Baking and with the bread making technique from the book ‘Bread’ by Eric Treuille & Ursula Ferrigno, the outcome was wonderful!! The crust is crispy, the inside is nice, soft and fluffy. It has a very very nice aroma too !The book says to apply steam to the oven when baking breads so as to achieve a crisp, crusty exterior. There are 3 methods to do so: using a sprayer, using ice cubes or using ceramic tiles. I have neither the sprayer nor ceramic tiles, so I used the ice cubes method. To apply steam with ice cubes is very simple, just place a wide tray or dish filled with ice cubes on the bottom rack or the floor of the oven while the oven preheats, then place the loaf in the oven before all the ice cubes melts. When the ice cubes have all melted, carefully remove the tray or dish from the oven.

Dough before rising…

Dough after rising… look at the doubled up size

1st & 2nd Roll out…

Final proving & into the oven !

Finally… Yummy !
Ingredients:
143g fresh milk (I used full milk)
35g egg
25g caster sugar
5g salt
250g bread flour
4g Instant yeast
38g butter (unsalted, if using salted then reduce the salt)
Method:
1. Place milk, egg, followed by caster sugar, salt, bread flour and yeast into the pan of the bread machine. Set to Dough function. Add in the butter after 8 ~ 10 mins into the kneading cycle. Continue to let the bread machine do the kneading. Stop the machine after the kneading cycle. Re-start the machine and let the dough knead for another 10mins before stopping the machine.
2. Remove dough from the bread pan, let it proof in room temperature in a mixing bowl, covered with cling wrap. Let proof for 60mins.
3. Remove dough and punch out the gas. Divide dough into 3 equal portion. Roll and shape into balls. Let the doughs rest and relax for 15 mins. (this ‘relaxing’ time is needed so that the dough will be easier to roll out and shaped).
4. On a lightly floured surface, flatten one dough and roll out into a longish shape. Roll up the dough swiss-roll style. Do the same for the two remaining doughs.
5. Flatten the rolled-up dough and roll out again into a long rectangular shape. Roll up tightly, and make as many rolls you can, swiss-roll style for the second time. Do the same for the two remaining doughs.
6. Place doughs in lightly greased bread tin/pan. Let the doughs proof for the second time, until it fills up 80% of the tin/pan. Cover with cling wrap.
7. Bake at pre-heated oven at 180 ~ 190 deg C for 30 to 35mins.
8. Unmould the bread immediately when removed from the oven. Let cool completely before slicing.
Breads craze…
12 November, 2007 at 1:55 pm | Posted in » Fresh Breads & Buns | Leave a commentTags: Baking
Recently, I’m into making breads… and I did it again on Friday evening… this time it’s Bacon & cheese buns. The taste of the melted cheese combine with the fragrant of the oven-baked bacon was wonderful. Hubby says the bread was abit hard though… which myself also thinks so… maybe I should try adding some bread improver to the recipes next time. =)
I have also bought quite a number of books on break making recently… hehehe
Here are the pix of the buns:

Bun dough

Bacon & cheese toppings

Freshly baked buns… yummy !
Past bakes….
6 November, 2007 at 6:19 pm | Posted in » Fresh Breads & Buns, » Handful Muffins & Cupcakes, » Yummy Cakes | 2 CommentsTags: Baking
Yesterday was my 1st try on breads…. I decided to give it a try on making this based on the Wassant sold in the Provence Bakery @ Holland V. Glad it turns out well… heheh =)
Chocolate swirl bread
Last Saturday, Lyana came over to my house for a baking lesson, too bad Mag & Lin can’t make it. We have a great time and we made some muffins & cheesecakes. Looking forward to another baking session with the girls soon…

Double Chocolate muffins with almonds

1 month ago I made this cake for my jiemeis who came over my house for a gathering just before my wedding.

Strawberry chocolate mousse cake
Recent Comments
Edna on X’mas Cream-Cheese Fruit… camellia136 on Mochi Bread: finding the right… Nina on X’mas Cream-Cheese Fruit… Amelia on Peanut Butter Cookies Ying on Mochi Bread: finding the right… -


-

Create a free website or blog at WordPress.com.
Entries and comments feeds.
