11th Daring Bakers Challenge – Pizza & Toppings
29 October, 2008 at 3:59 pm | Posted in » Daring Bakers, » Fresh Breads & Buns, » Recipes | 5 CommentsTags: » Daring Bakers, Baking, Food, Pizza, recipe

This month the Daring Bakers are going to be pizzaiolos!
Hosted by our dear vegan/gluten free baker: Rosa of Rosa’s Yummy Yums. For this challenge, she has chosen an easy to follow recipe for ‘Pizza Napoletana’ from ‘The Bread Baker’s Appretice’ , by Peter Reinhart, which yields a beautifully tasty, thin, crispy, yet chewy pizza crust.
I have always love to make my own pizzas, so this is definitely not something new to me… just that it will be using a different recipe and technique. I never have a home-made toss pizza crust before, this is sure to be challenge and I did not manage to get any photos on the tossing.
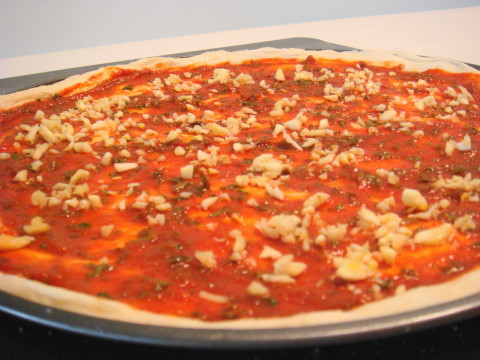
There is basically no restriction or rules to this month challenge, we are free to use any sauce and toppings, make it vegan or non-vegan. I choose to make the non-vegan version, and I have also half the recipe shown here. This crust recipe is definitely a keeping for me.
That being said, have a look at the following photos:


Have a look at what other DBers have created here.
Ingredients:
Make 6 pizza crusts (about 9-12 inches/23-30cm in diameter)
4-1/2 cups (20-1/4 ounces/607.5 grams) unbleached high-gluten (%14) bread flour or all purpose flour, chilled
1-3/4 tsp salt
1 tsp instant yeast
1/4 cup (2 ounces/60 grams) Olive oil or vegetable oil (both optional, but it’s better with)
1-3/4 cups (14 ounces/420 grams or 420 ml) water, ice cold (40° /4.5° C)
1 Tb sugar
Semolina/durum flour or cornmeal for dusting
DAY ONE
Method:
1. Mix together the flour, salt and instant yeast in a big bowl (or in the bowl of your stand mixer).
2. Add the oil, sugar and cold water and mix well (with the help of a large wooden spoon or with the paddle attachment, on low speed) in order to form a sticky ball of dough. On a clean surface, knead for about 5-7 minutes, until the dough is smooth and the ingredients are homogeneously distributed. If it is too wet, add a little flour (not too much, though) and if it is too dry add 1 or 2 teaspoons extra water.
NOTE: If you are using an electric mixer, switch to the dough hook and mix on medium speed for the same amount of time.The dough should clear the sides of the bowl but stick to the bottom of the bowl. If the dough is too wet, sprinkle in a little more flour, so that it clears the sides. If, on the contrary, it clears the bottom of the bowl, dribble in a teaspoon or two of cold water.
The finished dough should be springy, elastic, and sticky, not just tacky, and register 50°-55° F/10°-13° C.
3. Flour a work surface or counter. Line a jelly pan with baking paper/parchment. Lightly oil the paper.
4. With the help of a metal or plastic dough scraper, cut the dough into 6 equal pieces (or larger if you want to make larger pizzas).
NOTE: To avoid the dough from sticking to the scraper, dip the scraper into water between cuts.
5. Sprinkle some flour over the dough. Make sure your hands are dry and then flour them. Gently round each piece into a ball.
NOTE: If the dough sticks to your hands, then dip your hands into the flour again.
6. Transfer the dough balls to the lined jelly pan and mist them generously with spray oil. Slip the pan into plastic bag or enclose in plastic food wrap.
7. Put the pan into the refrigerator and let the dough rest overnight or for up to thee days.
NOTE: You can store the dough balls in a zippered freezer bag if you want to save some of the dough for any future baking. In that case, pour some oil(a few tablespooons only) in a medium bowl and dip each dough ball into the oil, so that it is completely covered in oil. Then put each ball into a separate bag. Store the bags in the freezer for no longer than 3 months. The day before you plan to make pizza, remember to transfer the dough balls from the freezer to the refrigerator.
DAY TWO
8. On the day you plan to eat pizza, exactly 2 hours before you make it, remove the desired number of dough balls from the refrigerator. Dust the counter with flour and spray lightly with oil. Place the dough balls on a floured surface and sprinkle them with flour. Dust your hands with flour and delicately press the dough into disks about 1/2 inch/1.3 cm thick and 5 inches/12.7 cm in diameter. Sprinkle with flour and mist with oil. Loosely cover the dough rounds with plastic wrap and then allow to rest for 2 hours.
9. At least 45 minutes before making the pizza, place a baking stone on the lower third of the oven. Preheat the oven as hot as possible (500° F/260° C).
NOTE: If you do not have a baking stone, then use the back of a jelly pan. Do not preheat the pan.
10. Generously sprinkle the back of a jelly pan with semolina/durum flour or cornmeal. Flour your hands (palms, backs and knuckles). Take 1 piece of dough by lifting it with a pastry scraper. Lay the dough across your fists in a very delicate way and carefully stretch it by bouncing it in a circular motion on your hands, and by giving it a little stretch with each bounce. Once the dough has expanded outward, move to a full toss.
NOTE: Make only one pizza at a time.
During the tossing process, if the dough tends to stick to your hands, lay it down on the floured counter and reflour your hands, then continue the tossing and shaping.
In case you would be having trouble tossing the dough or if the dough never wants to expand and always springs back, let it rest for approximately 5-20 minutes in order for the gluten to relax fully,then try again.
You can also resort to using a rolling pin, although it isn’t as effective as the toss method.
11. When the dough has the shape you want (about 9-12 inches/23-30 cm in diameter – for a 6 ounces/180g piece of dough), place it on the back of the jelly pan, making sure there is enough semolina/durum flour or cornmeal to allow it to slide and not stick to the pan.
12. Lightly top it with sweet or savory toppings of your choice.
NOTE: Remember that the best pizzas are topped not too generously. No more than 3 or 4 toppings (including sauce and cheese) are sufficient.
13. Slide the garnished pizza onto the stone in the oven or bake directly on the jelly pan. Close the door and bake for abour 5-8 minutes.
14. Take the pizza out of the oven and transfer it to a cutting board or your plate. In order to allow the cheese to set a little, wait 3-5 minutes before slicing or serving.
Mid-Autumn Festival
11 September, 2008 at 11:06 pm | Posted in » Recipes, » Yummy Cakes | 1 CommentTags: Baking, Cake, Food, recipe
The Mid-Autumn festival, also known as the Mooncake or Moon festival, falls on September 14th this year.
Every year on the fifteenth day of the eighth month of the lunar calendar, when the moon is at its maximum brightness for the entire year, the Chinese celebrate ‘zhong qiu jie’. Children are told the story of the moon fairy living in a crystal palace, who comes out to dance on the moon’s shadowed surface. The legend surrounding the ‘lady living in the moon’ dates back to ancient times, to a day when ten suns appeared at once in the sky. The Emperor ordered a famous archer to shoot down the nine extra suns. Once the task was accomplished, Goddess of Western Heaven rewarded the archer with a pill that would make him immortal. However, his wife found the pill, took it, and was banished to the moon as a result. Legend says that her beauty is greatest on the day of the Moon festival.
Other Moon Festival Legends
According to another legend, on this day the ‘Man in the Moon’ was spotted at an inn, carrying a writing tablet. When questioned, he said he was recording the names of all the happy couples who were fated to marry and live happily forever after. Accordingly, just as June is the traditional month for exchanging nuptials in the west, many Chinese weddings are held during the eighth lunar month, with the fifteenth day being the most popular.
Of course, the most famous legend surrounding the Moon festival concerns its possible role in Chinese history. Overrun by the Mongols in the thirteenth century, the Chinese threw off their oppressors in 1368 AD. It is said that mooncakes – which the Mongols did not eat – were the perfect vehicle for hiding and passing along plans for the rebellion. Families were instructed not to eat the mooncakes until the day of the moon festival, which is when the rebellion took place.
How to Celebrate the Mid-Autumn Festival
Today, Chinese people celebrate the Mid-Autumn festival with dances, feasting and moon gazing. Not to mention mooncakes. While baked goods are a common feature at most Chinese celebrations, mooncakes are inextricably linked with the Moon festival. One type of traditional mooncake is filled with lotus seed paste. Roughly the size of a human palm, these mooncakes are quite filling, meant to be cut diagonally in quarters and passed around. The salty yolk in the middle, representing the full moon, is an acquired taste.
More elaborate versions of mooncakes contain four egg yolks, which representing the four phases of the moon. Besides lotus seed paste, other traditional fillings include red bean paste and black bean paste.
While in the past mooncakes took up to four weeks to make, automation has speed up the process considerably. Today, mooncakes may be filled with everything from dates, nuts, and fruit to Chinese sausages. More exotic creations include green tea mooncakes, and ping pei or snowskin mooncakes, a Southeast Asian variation made with cooked glutinous rice flour. There is even a line of ice cream mooncakes.
This year is my 1st attempt to make both the traditional and snow skin mooncake.


Traditional Mooncake
Ingredients:
Make about 23 mini Mooncakes
Mooncake Pastry
350 grams – 400 grams Hong Kong Flour
230 grams sugar syrup
110 ml oil
1 Tablespoon alkaline water
Mooncake Filling
500 – 600 grams ready made white lotus paste (or any other flavour paste)
some melon seeds
some salted egg yolks, cooked and halved
Galze
1 egg, beaten
Method:
1. In a mixing bowl, mix together the sugar syrup, oil and alkaline water. Leave aside for at least 1 hour.
2. Add in the flour and mix well until the mixture is not sticky. Add in more flour if the mixture is running.
3. Mix together the ready made paste and melon. Divide into 45 grams each.
4. Wrap a egg yolk in the center of each paste and roll into a ball.
5. Divide the pastry skin into 30 grams each. Wrap the paste ball into the pastry skin. Press into mould.
6. Line a baking tray with baking paper and bake with top grill for about 5 mins.
7. Adjust the oven to top and bottom heat at 375 deg F. Brush the mooncake surface with egg wash. Bake for another 15-20 mins until golden brown.
8. Cool at room temperature.
Note: Traditional Mooncakes are best eaten 1-2 days after making. Mooncakes can be stored in air-tight containers up to 3 days after making, after that put in the fridge.
Snow Skin Mooncake
Ingredients:
Make about 18 Mini Mooncakes
Snow Skin Pastry
1 package (500 grams) snow skin premix
100 grams shortening
230 grams water
a few drops of flavored food color (I divide into 3 portion, 1 for green tea flavour, 1 for yam flavour, 1 for pandan flavour)
Mooncake Filling
500 grams ready made white lotus paste (or any other flavour paste)
some melon seeds
some salted egg yolks, cooked and halved
Method:
1. Mix the water and the premix together.
2. Add in shortening and food color.
3. Leave aside for about 15 mins – 1 hour.
4. Mix together the ready made paste and the melon seeds. Divide into 45 grams each.
5. Wrap a egg yolk in the center of each paste and roll into a ball.
6. Divide the snow skin pastry into 35 grams each. Wrap the paste ball into the snow skin. Press into mould.
7. Refrigerate for at least 1 hour before serving.
9th Daring Bakers Challenge – Chocolate Élairs
31 August, 2008 at 12:36 am | Posted in » Daring Bakers, » Recipes, » Pastry | 4 CommentsTags: » Daring Bakers, Baking, Food, Pastry, recipe
Hi All! It’s that time of the month again and this month we are going French!
Hosted by Tony of Tony Tahhan and Meeta of What’s for Lunch Honey?, they have chosen a recipe from Chocolate Desserts By Pierre Hermé, a cookbook written by Dorie Greenspan, Chocolate Éclairs by Pierre Hermé.
Some information on Éclair taken from Wikipedia. The Éclair is originated in France during the nineteenth century. The work is first attested both in English and in French in the 1860s. Some food historians speculate that the Éclairs were first made by Anotonin Carême (1784 – 1833), the famous French chef. The first known English-language recipe for Éclairs appears in the Boston Cooking School Cook Book by Mrs. D.A. Lincoln, published in 1884.
A Éclair is a long, thin pastry made with choux pastry or cream puff dough filled with a cream and topped with icing. The dough is piped into an oblong shape with a pastry bag and baked until it is crisp and hollow inside. Once cool, the pastry then is filled with a pastry cream, custard or whipped cream and topped with fondant icing of the same flavour as the filling.
For this month challenge, we are given alot of space to play around as long as we use the choux pastry recipe provided and keep one of the chocolate element, i.e the chocolate glaze and/or the chocolate pastry cream.
Being a chocoholic, I kept two of the chocolate elements but i omit the chocolate sauce that is supposed to be added into the chocolate glaze. And on top of that, I have added some chopped peanuts on top of the glaze. I simply love the taste of this recipe! It’s so chocolaty and yummy…
This recipe is relative simple, but I had some trouble making the chocolate glaze. When I added the butter in the glaze, there are alot of oil being produced and I have to pour away some and stir over low heat to combine them… thus I could not make a smooth glaze…


Remember to drop by other DBers’s blogs for their take on this here.
Cream Puff Dough
Ingredients:
Makes 20 – 24 Éclairs
1/2 cup (125 grams) whole milk
1/2 cup (125 grams) water
1 stick (4 ounces; 115 grams) unsalted butter, cut into 8 pieces
1/4 teaspoon sugar
1/4 teaspoon salt
1 cup (140 grams) all-purpose flour
5 large eggs, at room temperature
Method:
1. In a heavy bottomed medium saucepan, bring the milk, water, butter, sugar and salt to the boil.
2. Once the mixture is at a rolling boil, add all of the flour at once, reduce the heat to medium and start to stir the mixture vigorously with a wooden spoon. The dough comes together very quickly. Do not worry if a slight crust forms at the bottom of the pan, it’s supposed to. You need to carry on stirring for a further 2-3 minutes to dry the dough. After this time the dough will be very soft and smooth.
3. Transfer the dough into a bowl of a mixer fitted with the paddle attachment, or using your handmixer or if you still have the energy, continue by hand. Add the eggs one at a time, beating after each egg has been added to incorporate it into the dough. You will notice that after you have added the first egg, the dough will separate, once again do not worry. As you keep working the dough, it will come back all together again by the time you have added the third egg. In the end the dough should be thick and shiny and when lifted it should fall back into the bowl in a ribbon.
4. The dough should be still warm. It is now ready to be used for the éclairs as directed above.
Notes:
1. Once the dough is made you need to shape it immediately.
2. You can pipe the dough and the freeze it. Simply pipe the dough onto parchment-lined baking sheets and slide the sheets into the freezer. Once the dough is completely frozen, transfer the piped shapes into freezer bags. They can be kept in the freezer for up to a month.
Baking Éclairs
1. Preheat your oven to 375 degrees F (190 degrees C). Divide the oven into thirds by positioning the racks in the upper and lower half of the oven. Line two baking sheets with waxed or parchment paper.
2. Fill a large pastry bag fitted with a 2/3 (2cm) plain tip nozzle with the warm cream puff dough. Pipe the dough onto the baking sheets in long, 4 to 4-1/2 inches (about 11 cm) chubby fingers. Leave about 2 inches (5 cm) space in between each dough strip to allow them room to puff. The dough should give you enough to pipe 20-24 éclairs.
3. Slide both the baking sheets into the oven and bake for 7 minutes. After the 7 minutes, slip the handle of a wooden spoon into the door to keep in ajar. When the éclairs have been in the oven for a total of 12 minutes, rotate the sheets top to bottom and front to back. Continue baking for a further 8 minutes or until the éclairs are puffed, golden and firm. The total baking time should be approximately 20 minutes.
Notes:
1. The éclairs can be kept in a cool, dry place for several hours before filling.
Assembling the éclairs:
1. Slice the éclairs horizontally, using a serrated knife and a gently sawing motion. Set aside the bottoms and place the tops on a rack over a piece of parchment paper.
2. The glaze should be barely warm to the touch (between 95 – 104 degrees F or 35 – 40 degrees C, as measured on an instant read thermometer). Spread the glaze over the tops of the éclairs using a metal icing spatula. Allow the tops to set and in the meantime fill the bottoms with the pastry cream.
3. Pipe or spoon the pastry cream into the bottoms of the éclairs. Make sure you fill the bottoms with enough cream to mound above the pastry. Place the glazed tops onto the pastry cream and wriggle gently to settle them.
Notes:
1. If you have chilled your chocolate glaze, reheat by placing it in a bowl over simmering water, stirring it gently with a wooden spoon. Do not stir too vigorously as you do not want to create bubbles.
2. The éclairs should be served as soon as they have been filled.
Chocolate Pastry Cream
Ingredients:
2 cups (500 grams) whole milk
4 large egg yolks
6 tbsp (75 grams) sugar
3 tablespoons cornstarch, sifted
7 oz (200 grams) bittersweet chocolate, preferably Velrhona Guanaja, melted
2-1/2 tbsp (1-1/4 oz, 40 grams) unsalted butter, at room temperature
Method:
1. In a small saucepan, bring the milk to a boil. In the meantime, combine the yolks, sugar and cornstarch together and whisk in a heavy‐bottomed saucepan.
2. Once the milk has reached a boil, temper the yolks by whisking a couple spoonfuls of the hot milk into the yolk mixture.Continue whisking and slowly pour the rest of the milk into the tempered yolk mixture.
3. Strain the mixture back into the saucepan to remove any egg that may have scrambled. Place the pan over medium heat and whisk vigorously (without stop) until the mixture returns to a boil. Keep whisking vigorously for 1 to 2 more minutes (still over medium heat).Stir in the melted chocolate and then remove the pan from the heat.
4. Scrape the pastry cream into a small bowl and set it in an ice‐water bath to stop the cooking process. Make sure to continue stirring the mixture at this point so that it remains smooth.
5. Once the cream has reached a temperature of 140 F remove from the ice‐water bath and stir in the butter in three or four installments. Return the cream to the ice‐water bath to continue cooling, stirring occasionally, until it has completely cooled. The cream is now ready to use or store in the fridge.
Notes:
1. The pastry cream can be made 2‐3 days in advance and stored in the refrigerator.
2. In order to avoid a skin forming on the pastry cream, cover with plastic wrap pressed onto the cream.
3. Tempering the eggs raises the temperature of the eggs slowly so that they do not scramble.
Chocolate Glaze
Ingredients:
Makes 1 cup or 300 grams
1/3 cup (80 grams) heavy cream
3-1/2 oz (100 grams) bittersweet chocolate, finely chopped
4 tsp (20 grams) unsalted butter, cut into 4 pieces, at room temperature
7 tbsp (110 grams) Chocolate Sauce (recipe below), warm or at room temperature
Method:
1. In a small saucepan, bring the heavy cream to a boil. Remove from the heat and slowly begin to add the chocolate, stirring with a wooden spoon or spatula.
2. Stirring gently, stir in the butter, piece by piece followed by the chocolate sauce.
Notes:
1. If the chocolate glaze is too cool (i.e. not liquid enough) you may heat it briefly in the microwave or over a double boiler. A double boiler is basically a bowl sitting over (not touching) simmering water.
2. It is best to glaze the eclairs after the glaze is made, but if you are pressed for time, you can make the glaze a couple days ahead of time, store it in the fridge and bring it up to the proper temperature (95 to 104 F) when ready to glaze.
Chocolate Sauce
Ingredients:
Makes 1-1/2 cups or 525 grams
4-1/2 oz (130 grams) bittersweet chocolate, finely chopped
1 cup (250 grams) water
1/2 cup (125 grams) crème fraîche, or heavy cream
1/3 cup (70 grams) sugar
Method:
1. Place all the ingredients into a heavy‐bottomed saucepan and bring to a boil, making sure to stir constantly. Then reduce the heat to low and continue stirring with a wooden spoon until the sauce thickens.
2. It may take 10‐15 minutes for the sauce to thicken, but you will know when it is done when it coats the back of your spoon.
Notes:
1. You can make this sauce ahead of time and store it in the refrigerator for two weeks. Reheat the sauce in a microwave oven or a double boiler before using.
2. This sauce is also great for cakes, ice-cream and tarts.
8th Daring Bakers Challenge – Filbert Gateau with Praline Buttercream
30 July, 2008 at 12:10 am | Posted in » Daring Bakers, » Recipes, » Yummy Cakes | 5 CommentsTags: » Daring Bakers, Baking, Cake, Food
This month challenge is Filbert Gateau with Praline Buttercream, adopted from Great Cakes by Carol Walter and hosted by Chris of Mele Cotte.
The recipe asked for a round cake, but I made mine into a few mini round cakes for easy distribution to friends & family.
I did not make any changes to the recipe this time as I find that this combination of flavors is very very rich and best of all… alot of RUM is being used, which brings out the flavors of the hazelnuts!! I could have done better decorations if not for the time constraints.


Take a look at other beautiful cakes done by other DBers here.
Ingredients:
1 Filbert Genoise
1 recipe sugar syrup, flavored with dark rum
1 recipe Praline Buttercream
1/2 cup heavy cream, whipped to soft peaks
1 recipe Apricot Glaze
1 recipe Ganache Glaze, prepared just before using
3 tablespoons filberts, toasted and coarsely chopped
Filbert Genoise:
Because of the amount of nuts in the recipe, this preparation is different from a classic genoise.
1-1/2 cups hazelnuts, toasted/skinned
2/3 cup cake flour, unsifted
2 Tbsp. cornstarch
7 large egg yolks
1 cup sugar, divided ¼ & ¾ cups
1 tsp. vanilla extract
1/2 tsp. grated lemon rind
5 large egg whites
1/4 cup warm, clarified butter (100 – 110 degrees)
Method:
1. Position rack in the lower 3rd of the oven and preheat to 350 degrees. Grease and flour a 10” X 2” inch round cake pan.
2. Using a food processor, process nuts, cake flour, and cornstarch for about 30 seconds. Then, pulse the mixture about 10 times to get a fine, powdery mixture. You’ll know the nuts are ready when they begin to gather together around the sides of the bowl. While you want to make sure there aren’t any large pieces, don’t over-process. Set aside.
3. Put the yolks in the bowl of an electric mixer, with the whisk attachment, and beat until thick and light in color, about 3-4 minutes on med-high speed. Slowly, add 3/4 cup of sugar. It is best to do so by adding a tablespoon at a time, taking about 3 minutes for this step. When finished, the mixture should be ribbony. Blend in the vanilla and grated lemon rind. Remove and set aside.
4. Place egg whites in a large, clean bowl of the electric mixer with the whisk attachment and beat on medium speed, until soft peaks. Increase to med-high speed and slowly add the remaining 1/4 cup of sugar, over 15-20 seconds or so. Continue to beat for another 1/2 minute. Add the yolk mixture to the whites and whisk for 1 minute.
5. Pour the warm butter in a liquid measure cup (or a spouted container). * It must be a deep bottom bowl and work must be fast.* Put the nut meal in a mesh strainer (or use your hand – working quickly) and sprinkle it in about 2 tablespoons at a time – folding it carefully for about 40 folds. Be sure to exclude any large chunks/pieces of nuts. Again, work quickly and carefully as to not deflate the mixture. When all but about 2 Tbsp. of nut meal remain, quickly and steadily pour the warm butter over the batter. Then, with the remaining nut meal, fold the batter to incorporate, about 13 or so folds.
6. With a rubber spatula, transfer the batter into the prepared pan, smoothing the surface with the spatula or back of a spoon. **If collected butter remains at the bottom of the bowl, do not add it to the batter! It will impede the cake rising while baking.
7. Tap the pan on the counter to remove air bubbles and bake in the preheated oven for 30-35 minutes. You’ll know the cake is done when it is springy to the touch and it separates itself from the side of the pan. Remove from oven and allow to stand for 5 minutes. Invert onto a cake rack sprayed with nonstick coating, removing the pan. Cool the cake completely.
*If not using the cake right away, wrap thoroughly in plastic wrap, then in a plastic bag, then in the refrigerator for up to 3 days. If freezing, wrap in foil, then the bag and use within 2-3 months.
Sugar Syrup:
Makes 1 cup, good for one 10-inch cake – split into 3 layers
1 cup water
1/4 cup sugar
2 Tbsp. dark rum or orange flavored liqueur
Method:
In a small, yet heavy saucepan, bring the water and sugar to a boil and simmer for 5 minutes. Remove from heat, add the liqueur. Cool slightly before using on the cake. *Can be made in advance.
Praline Buttercream:
1 recipe Swiss Buttercream
1/3 cup praline paste
1-1/2 – 2 Tbsp. Jamaican rum (optional)
Method:
Blend 1/2 cup buttercream into the paste, then add to the remaining buttercream. Whip briefly on med-low speed to combine. Blend in rum.
Swiss Buttercream:
4 large egg whites
3/4 cup sugar
1-1/2 cups (3 sticks) unsalted butter, slightly firm
1-1/2 -2 Tbsp. Grand Marnier or liqueur of your choice
1 tsp. vanilla
Method:
1. Place the egg whites in a lg/ bowl of a elevtric mixer and beat with the whisk attachment until the whites are foamy and they begin to thicken (just before the soft peak stage). Set the bowl over a saucepan filled with about 2 inches of simmering water, making sure the bowl is not touching the water. Then, whisk in the sugar by adding 1-2 tablespoon of sugar at a time over a minutes time. Continue beating 2-3 minutes or until the whites are warm (about 120 degrees) and the sugar is dissolved. The mixture should look thick and like whipped marshmallows.
2. Remove from pan and with either the paddle or whisk attachment, beat the egg whites and sugar on med-high until its a thick, cool meringue – about 5-7 minutes. *Do not overbeat*. Set aside.
3. Place the butter in a separate clean mixing bowl and, using the paddle attachment, cream the butter at medium speed for 40-60 seconds, or until smooth and creamy. *Do not overbeat or the butter will become toooooo soft.*
4. On med-low speed, blend the meringue into the butter, about 1-2 Tbsp. at a time, over 1 minute. Add the liqueur and vanilla and mix for 30-45 seconds longer, until thick and creamy.
5. Refrigerate 10-15 minutes before using.
Wait! My buttercream won’t come together! Reheat the buttercream briefly over simmering water for about 5 seconds, stirring with a wooden spoon. Be careful and do not overbeat. The mixture will look broken with some liquid at the bottom of the bowl. Return the bowl to the mixer and whip on medium speed just until the cream comes back together.
Wait! My buttercream is too soft! Chill the buttercream in the refrigerator for about 10 minutes and rewhip. If that doesn’t work, cream an additional 2-4 Tbsp. of butter in a small bowl– making sure the butter is not as soft as the original amount, so make sure is cool and smooth. On low speed, quickly add the creamed butter to the buttercream, 1 Tbsp. at a time.
Refrigerate in an airtight container for up to 5 days, or can be frozen for up to 6 months. If freezing, store in 2 16-oz. plastic containers and thaw in the refrigerator overnight or at room temperature for several hours.
Praline Paste:
1 cup (4-1/2 oz.) Hazelnuts, toasted/skinless
2/3 cup Sugar
Line a jelly roll pan with parchment and lightly butter.
Method:
Put the sugar in a heavy 10-inch skillet. Heat on low flame for about 10-20 min until the sugar melts around the edges. Do not stir the sugar. Swirl the pan if necessary to prevent the melted sugar from burning. Brush the sides of the pan with water to remove sugar crystals. If the sugar in the center does not melt, stir briefly. When the sugar is completely melted and caramel in color, remove from heat. Stir in the nuts with a wooden spoon and separate the clusters. Return to low heat and stir to coat the nuts on all sides. Cook until the mixture starts to bubble. **Remember – extremely hot mixture.** Then onto the parchment lined sheet and spread as evenly as possible. As it cools, it will harden into brittle. Break the candied nuts into pieces and place them in the food processor. Pulse into a medium-fine crunch or process until the brittle turns into a powder. To make paste, process for several minutes. Store in an airtight container and store in a cook dry place. Do not refrigerate.
Apricot Glaze:
Good for one 10-inch cake
2/3 cup thick apricot preserves
1 Tbsp. water
Method:
1. In a small, yet heavy saucepan, bring the water and preserves to a slow boil and simmer for 2-3 minutes. If the mixture begins to stick to the bottom of the saucepan, add water as needed.
2. Remove from heat and, using a strainer, press the mixture through the mesh and discard any remnants. With a pastry brush, apply the glaze onto the cake while the cake is still warm. If the glaze is too thick, thin to a preferred consistency with drops of water.
Ganache Glaze:
Makes about 1 cup, enough to cover the top and sides of a 9 or 10 inch layer or tube cake
**Ganache can take on many forms. While warm – great fudge sauce. While cool or lukewarm – semisweet glaze. Slightly chilled – can be whipped into a filling/frosting. Cold & solid – the base of candied chocolate truffles.
6 oz. (good) semisweet or bittersweet chocolate, like Lindt
6 oz. (3/4 cup heavy cream)
1 tbsp. light corn syrup
1 Tbsp. Grand Marnier, Cointreay, or dark Jamaican rum (optional)
3/4 tsp. vanilla
1/2 – 1 tsp. hot water, if needed
Method:
1. Blend vanilla and liqueur/rum together and set aside.
2. Break the chocolate into 1-inch pieces and place in the basket of a food processor and pulse until finely chopped. Transfer into a medium sized bowl and set aside.
3. Heat the cream and corn syrup in a saucepan, on low, until it reached a gentle boil. Once to the gently boil, immediately and carefully pour over the chocolate. Leave it alone for one minute, then slowly stir and mix the chocolate and cream together until the chocolate is melted and incorporated into the cream. Carefully blend in vanilla mixture. If the surface seems oily, add 1/2 – 1 tsp hot water. The glaze will thicken, but should still be pourable. If it doesn’t thicken, refrigerate for about 5 minutes, but make sure it doesn’t get too cold!
Assembling Cake:
1. Cut a cardboard disk slightly smaller than the cake. Divide the cake into 3 layers and place the first layer top-side down on the disk. Using a pastry brush, moisten the layer with 3-4 Tbsp. of warm sugar syrup. Measure out 1 cup of praline buttercream and set aside.
2. Spread the bottom layer with a 1/4-inch thickness of the remaining buttercream. Cover with 1/2 of the whipped cream, leaving 1/4-inch border around the edge of the cake. Place the middle layer over the first, brush with sugar syrup, spreading with buttercream. Cover with the remaining whipped cream.
3. Moisten the cut side of the third layer with additional sugar syrup and place cut side down on the cake. Gently, press the sides of the cake to align the layers. Refrigerate to chill for at least 30 minutes.
4. Lift the cake by sliding your palm under the cardboard. Holding a serrated or very sharp night with an 8-ich blade held parallel to the sides of the cake, trim the sides so that they are perfectly straight. Cut a slight bevel at the top to help the glaze drip over the edge. Brush the top and sides of the cake with warm apricot glaze, sealing the cut areas completely. Chill while you prepare the ganache.
5. Place a rack over a large shallow pan to catch the ganache drippings. Remove the gateau from the refrigerator and put it the rack. With a metal spatula in hand, and holding the saucepan about 10 inches above the cake, pour the ganache onto the cake’s center. Move the spatula over the top of the ganache about 4 times to get a smooth and mirror-like appearance. The ganache should cover the top and run down the sides of the cake. When the ganache has been poured and is coating the cake, lift one side of the rack and bang it once on the counter to help spread the ganache evenly and break any air bubbles. (Work fast before setting starts.) Patch any bare spots on the sides with a smaller spatula, but do not touch the top after the “bang”. Let the cake stand at least 15 minutes to set after glazing.
6. To garnish the cake, fit a 12 – 14-inch pastry bag with a #114 large leaf tip. Fill the bag with the reserved praline cream. Stating 1/2 inch from the outer edge of the cake, position the pastry tube at a 90 degree angle with the top almost touching the top of the cake. Apply pressure to the pastry bag, moving it slightly toward the center of the cake. As the buttercream flows on the cake, reverse the movement backward toward the edge of the cake and finish by pulling the bag again to the center. Stop applying pressure and press the bag downward, then quickly pull the tip up to break the flow of frosting. Repeat, making 12 leaves evenly spaced around the surface of the cake.
7. Make a second row of leaves on the top of the first row, moving the pastry bag about 3/4 inch closer to the center. The leaves should overlap. Make a 3rd row, moving closer and closer to the center. Add a 4th row if you have the room. But, leave a 2-inch space in the center for a chopped filbert garnish. Refrigerate uncovered for 3-4 hours to allow the cake to set. Remove the cake from the refrigerator at least 3 hours before serving.
8. Leftover cake can be covered with foil and kept in the refrigerator for up to 5 days.
Key Ingredients
29 July, 2008 at 10:03 am | Posted in Others | Leave a commentTags: » Cooking, Baking
About 3 weeks ago I received a comment on my Mochi Bread post from Key Ingredients asking to feature the recipe in their blog. Let me get a brief intro of Key Ingredients.
Key Ingredients is an online recipe database where it’s the best place to find, create, share and collect all of your recipes…. and most of all, it’s free! You can even print your own cookbook from there! It’s definitely a recipe paradise for most of us bakers and cookers.
This morning, I received at email from them that my blog is being featured. You can read more of it here =).
ByeBye Sex Pistol….
8 July, 2008 at 9:35 pm | Posted in » Grumbles...Grumbles..., Others | 1 CommentTags: Grumbles
I was really sad on last fri… as hubby decided to sell away one of our 1000% bearbrick… it has been with us for about a year plus… and I have feelings for it… so I decided to take lots of pix together wif it for remembrance…
The new owner came to collect on Sat… being unable to bear the sight of sending him to another owner… I ask hubby to go down himself… cos I scare I will cry… let’s hope that the new owner will treat him well…..
Here are the pix… with remembrance of our 1000% Sex Pistol and I wana dedicate this post to it….


Byebye Sex Pistol……..
Singapore 1st Toy & Comic Convention
1 July, 2008 at 11:49 am | Posted in » Grumbles...Grumbles..., Others | 1 CommentTags: Grumbles
Finally!!! Singapore 1st Toy Convention!!! I have been waiting for this event in Singapore for as long as I can remember… This type of toy convention is soooo soooo common in countries like Hong Kong & Japan but here in Singapore it’s the 1st time ever…. and of cos, being a toy collector & lover, I’m super duper excited & happy when I 1st heard the news that there is going to be one right here in SG!
It’s a 3-days event (fri – sun), the 1st day being the preview day is only open to invited people… people like media and those wif invitation tickets… and the last 2 days is opened to public… Luckily my hubby managed to get us a pair of preview tickets and we managed to takes lots of pix and able walk around the convention without squeezing… cos on Sat, which is opened to public, the crowd is damn crazy… it’s even worst then PC show… but I’m not complaining…. hehehe
We saw alot of toy sellers we know there as well as chatting wif strangers who shared the same interest… I would say it’s a big get together for all toy collects in SG. I also met up with 2 of my Blythe friends… We even brought some of our collection for the artistes to sign.
On the last day… yes! Me & hubby went for all the 3 days! hahahaha… the crowd wasn’t as bad as Sat, and I managed to take some more pix. Overall this toy con was a great success!! Even the organizer didn’t expect the turn out to go so good & popular! and guess wat!! They have release news that there will be going to be another one next year & it’s going to be bigger wif more toy exhibitors!!! YEA!!! I really cant wait! See you next year Toy Con!
Time for the pix!! WARNING! NOT FOR THE FAINT HEARTED! hehehe

Bearbricks exhibition… it’s quite a disappointment thou…

Blythe exhibition booth

Customised Blythe by celebrity make-up artiste, Andy Lee

Close up

1000% Blythe!!

The blythes me & my blythe frens brought for the autograph

Junko Wong, the blythe creative producer and CWC executive from Japan.

Damaged done from the Toy Con

1000% To-Fu!!

1000% Molly To-fu

Got our To-Fu autographed by the To-fu artiste, Shin from DevilRobots… I even request him to customise one wif a blythe face…. it’s so cute!

All of our autographed To-Fus!
I Missed It!….
30 June, 2008 at 9:59 am | Posted in » Grumbles...Grumbles... | 1 CommentTags: Grumbles
I missed it this month… Yes! i’m talking about the June Daring Baker’s Challenge…. I am so busy that I literally have no time to bake this challenge… =(
However, I will still challenge myself to bake this recipe… but, do have a look at what other DBers have done here…
Busy… Busy…
18 June, 2008 at 11:01 am | Posted in » Grumbles...Grumbles... | 2 CommentsTags: Grumbles
Have been rather busy lately with my new job… and… YES!!… I have finally moved on to a new company after being stagnant in the previous one for like 3 years and after all the grumbles and dilly dally to leave… I just couldn’t take it anymore one day and enough is enough, sent out the resignation email and I’m gone in two weeks time…
The new job is so far so good, at least it’s what I wanted… the job scope is good, the colleagues are a fun lot… what else can I complaint…
Well… the only side back is that I havent got anytime to bake!! Wanted to do some baking during my month break in between jobs… but somehow, I always got distracted by something else…
There are so many things I wana do, bake and so many movies I wana catch… but recently seems like there’s not enough time…
6th Daring Baker’s Challenge – Opéra Cake
28 May, 2008 at 6:53 pm | Posted in » Daring Bakers, » Recipes, » Yummy Cakes | 6 CommentsTags: Add new tag, » Daring Bakers, Baking, Cake, Food, recipe
This month DB Challenge is an extremely elegant and polished French dessert that is believed to have been created around the beginning of the 1900s. Many people credit a gentleman by the name of Louis Clichy with inventing the cake and that’s why it’s sometimes referred to as Clichy Cake.
This cake is made up of five components namely: a joconde (cake layer), syrup, buttercream, ganache or mousse and a final glaze.
Traditionally, this cake is flavoured with darker flavours such as chocolate or coffee. But our hostesses of this month, Lis of La Mia Cucina, Ivonne of Cream Puffs in Venice, Fran of Apples Peaches Pumpkin Pie and Shea of Whiskful, decided to have this cake light in both color and flavour.
We are allow to add any flavours to the cake as long as it stays light in color and flavour. I have added Rum to the syrup and some lemon extract to the buttercream… And I really love the combination of these flavours!
Here are the pix… cant really see the buttercream layer, it was quite a challenge to spread it…


You can view the rest of the Daring Bakers’ Opéra Cakes here.
For the joconde
(Note: The joconde can be made up to 1 day in advance and kept wrapped at room temperate)
What you’ll need:
– 2 12-1/2 x 15-1/2-inch (31 x 39-cm) jelly-roll pans (Note: If you do not have jelly-roll pans this size, do not fear! You can use different-sized jelly-roll pans like 10 x 15-inches.)
– a few tablespoons of melted butter (in addition to what’s called for in the ingredients’ list) and a brush (to grease the pans)
– parchment paper
– a whisk and a paddle attachment for a stand mixer or for a handheld mixer
– two mixing bowls (you can make do with one but it’s preferable to have two)
Ingredients:
6 large egg whites, at room temperature
2 tbsp. (30 grams) granulated sugar
2 cups (225 grams) ground blanched almonds
2 cups icing sugar, sifted
6 large eggs
1/2 cup (70 grams) all-purpose flour
3 tbsp. (1-1/2 ounces; 45 grams) unsalted butter, melted and cooled
Method:
1. Divide the oven into thirds by positioning a rack in the upper third of the oven and the lower third of the oven.
2. Preheat the oven to 425◦F. (220◦C).
3. Line two 12-1/2 x 15-1/2- inch (31 x 39-cm) jelly-roll pans with parchment paper and brush with melted butter.
4. In the bowl of a stand mixer fitted with the whisk attachment (or using a handheld mixer), beat the egg whites until they form soft peaks. Add the granulated sugar and beat until the peaks are stiff and glossy. If you do not have another mixer bowl, gently scrape the meringue into another bowl and set aside.
5. If you only have one bowl, wash it after removing the egg whites or if you have a second bowl, use that one. Attach the paddle attachment to the stand mixer (or using a handheld mixer again) and beat the almonds, icing sugar and eggs on medium speed until light and voluminous, about 3 minutes.
6. Add the flour and beat on low speed until the flour is just combined (be very careful not to overmix here!!!).
7. Using a rubber spatula, gently fold the meringue into the almond mixture and then fold in the melted butter. Divide the batter between the pans and spread it evenly to cover the entire surface of each pan.
8. Bake the cake layers until they are lightly browned and just springy to the touch. This could take anywhere from 5 to 9 minutes depending on your oven. Place one jelly-roll pan in the middle of the oven and the second jelly-roll pan in the bottom third of the oven.
9. Put the pans on a heatproof counter and run a sharp knife along the edges of the cake to loosen it from the pan. Cover each with a sheet of parchment or wax paper, turn the pans over, and unmold.
10. Carefully peel away the parchment, then turn the parchment over and use it to cover the cakes. Let the cakes cool to room temperature.
For the syrup
(Note: The syrup can be made up to 1 week in advance and kept covered in the refrigerator.)
Ingredients:
1/2 cup (125 grams) water
1/3 cup (65 grams) granulated sugar
1 to 2 tbsp. of the flavouring of your choice (i.e., vanilla extract, almond extract, cognac, limoncello, coconut cream, honey etc.)
Method:
1. Stir all the syrup ingredients together in the saucepan and bring to a boil.
2. Remove from the heat and let cool to room temperature.
For the buttercream
(Note: The buttercream can be made up to 1 month in advance and packed in an airtight container. If made way in advance, you can freeze the buttercream. Alternatively you can refrigerate it for up to 4 days after making it. To use the buttercream simply bring it to room temperature and then beat it briefly to restore its consistency.)
Ingredients:
1 cup (100 grams) granulated sugar
1/4 cup (60 grams) water
seeds of one vanilla bean (split a vanilla bean down the middle and scrape out the seeds) or 1 tbsp. pure vanilla extract (Note: If you are flavouring your buttercream and do not want to use the vanilla, you do not have to. Vanilla will often enhance other flavours but if you want an intense, one-flavoured buttercream, then by all means leave it out!)
1 large egg
1 large egg yolk
1-3/4 cups (7 ounces; 200 grams) unsalted butter, at room temperature
flavouring of your choice (a tablespoon of an extract, a few tablespoons of melted white chocolate, citrus zest, etc.)
Method:
1. Combine the sugar, water and vanilla bean seeds or extract in a small saucepan and warm over medium heat just until the sugar dissolves.
2. Continue to cook, without stirring, until the syrup reaches 225◦F (124◦C) on a candy or instant-read thermometer. Once it reaches that temperature, remove the syrup from the heat.
3. While the syrup is heating, begin whisking the egg and egg yolk at high speed in the bowl of your mixer using the whisk attachment. Whisk them until they are pale and foamy.
4. When the sugar syrup reaches the correct temperature and you remove it from the heat, reduce the mixer speed to low speed and begin slowly (very slowly) pouring the syrup down the side of the bowl being very careful not to splatter the syrup into the path of the whisk attachment. Some of the syrup will spin onto the sides of the bowl but don’t worry about this and don’t try to stir it into the mixture as it will harden!
5. Raise the speed to medium-high and continue beating until the eggs are thick and satiny and the mixture is cool to the touch (about 5 minutes or so).
6. While the egg mixture is beating, place the softened butter in a bowl and mash it with a spatula until you have a soft creamy mass.
7. With the mixer on medium speed, begin adding in two-tablespoon chunks. When all the butter has been incorporated, raise the mixer speed to high and beat until the buttercream is thick and shiny.
8. At this point add in your flavouring and beat for an additional minute or so.
9. Refrigerate the buttercream, stirring it often, until it’s set enough (firm enough) to spread when topped with a layer of cake (about 20 minutes).
For the white chocolate ganache/mousse
(Note: The mousse can be made ahead and refrigerated until you’re ready to use it.)
Ingredients:
7 ounces white chocolate
1 cup plus 3 tbsp. heavy cream (35% cream)
1 tbsp. liquer of your choice (Bailey’s, Amaretto, etc.)
Method:
1. Melt the white chocolate and the 3 tbsp. of heavy cream in a small saucepan.
2. Stir to ensure that it’s smooth and that the chocolate is melted. Add the tablespoon of liqueur to the chocolate and stir. Set aside to cool completely.
3. In the bowl of a stand mixer, whip the remaining 1 cup of heavy cream until soft peaks form.
4. Gently fold the whipped cream into the cooled chocolate to form a mousse.
5. If it’s too thin, refrigerate it for a bit until it’s spreadable.
6. If you’re not going to use it right away, refrigerate until you’re ready to use.
For the glaze
(Note: It’s best to make the glaze right when you’re ready to finish the cake.)
Ingredients:
14 ounces white chocolate, coarsely chopped
1/2 cup heavy cream (35% cream)
Method:
1. Melt the white chocolate with the heavy cream. Whisk the mixture gently until smooth.
2. Let cool for 10 minutes and then pour over the chilled cake. Using a long metal cake spatula, smooth out into an even layer.
3. Place the cake into the refrigerator for 30 minutes to set.
Assembling the Opéra Cake
(Note: The finished cake should be served slightly chilled. It can be kept in the refrigerator for up to 1 day).
1. Line a baking sheet with parchment or wax paper.
2. Working with one sheet of cake at a time, cut and trim each sheet so that you have two pieces (from each cake so you’ll have four pieces in total): one 10-inch (25-cm) square and one 10 x 5-inch (25 x 12-1/2-cm) rectangle.
3. Step A (if using buttercream only and not making the ganache/mousse):
4. Place one square of cake on the baking sheet and moisten it gently with the flavoured syrup.
5. Spread about one-third of the buttercream over this layer.
6. Top with the two rectangular pieces of cake, placing them side by side to form a square. Moisten these pieces with the flavoured syrup.
7. Spread another third of the buttercream on the cake and then top with the third square of joconde. Use the remaining syrup to wet the joconde. Spread the remaining buttercream on top of the final layer of joconde and then refrigerate until very firm (at least half an hour).
8. Make the glaze and after it has cooled, pour/spread it over the top of the chilled cake. Refrigerate the cake again to set the glaze.
9. Serve the cake slightly chilled. This recipe will yield approximately 20 servings.
10. Step B (if making the ganache/mousse):
11. Place one square of cake on the baking sheet and moisten it gently with the flavoured syrup.
12. Spread about three-quarters of the buttercream over this layer.
13. Top with the two rectangular pieces of cake, placing them side by side to form a square. Moisten these pieces with the flavoured syrup.
14. Spread the remaining buttercream on the cake and then top with the third square of joconde. Use the remaining syrup to wet the joconde and then refrigerate until very firm (at least half an hour).
15. Prepare the ganache/mousse (if you haven’t already) and then spread it on the top of the last layer of the joconde. Refrigerate for at least two to three hours to give the ganache/mousse the opportunity to firm up.
16. Make the glaze and after it has cooled, pour/spread it over the top of the chilled cake. Refrigerate the cake again to set the glaze.
17. Serve the cake slightly chilled. This recipe will yield approximately 20 servings.
Recent Comments
Edna on X’mas Cream-Cheese Fruit… camellia136 on Mochi Bread: finding the right… Nina on X’mas Cream-Cheese Fruit… Amelia on Peanut Butter Cookies Ying on Mochi Bread: finding the right… -


-

Create a free website or blog at WordPress.com.
Entries and comments feeds.
